EDIT: I’m leaving this post up here because it contains useful information, however please note that you DO NOT need to perform these steps to get the Vampire working well under Pixhawk. In fact, I found that by removing the middle motors from yaw, the copter would roll whenever trying to yaw. This is different to the results I had when using Megapirates, so perhaps something has changed in the code or how Pixhawk interprets it.
I therefore recommend you use the standard APM Hexi firmware first, and only follow the below steps if you have issues with yaw. Original post follows below: ——-
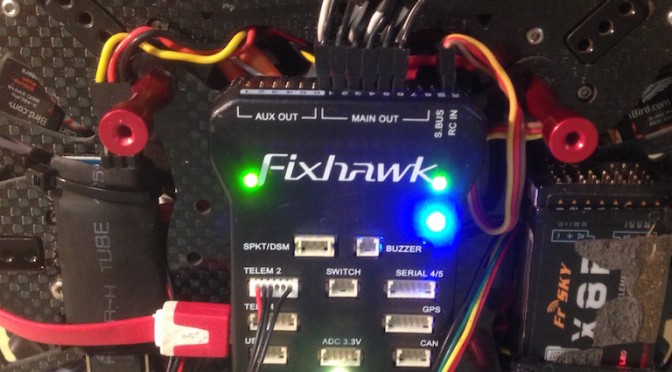
I’ve decided to install a proper Pixhawk FC in my Vampire hexicopter, to replace the Megapirates that was running on my old Multiwiicopter PARIS V5 board.
In order to get the Vampire flying nicely, you will need to compile your own hex file for the APM, and change the motor mix to accommodate the flat H motor layout.
This is because the middle motors must not be used for yaw, or the craft behaves oddly and loses / gains a lot of altitude when yawing.
Follow this guide to prepare your PC to compile the pixhawk code, and stop at step 5.
Once you’ve prepared the code, navigate to /ardupilot/libraries/AP_Motors and open the AP_MotorsHexa.cpp file. I suggest using Notepad++ to make it easy to read. In here, you’ll find the motor layouts. For the Vampire, we are interested in the X frame layout:
// X frame set-up
add_motor(AP_MOTORS_MOT_1,  90, AP_MOTORS_MATRIX_YAW_FACTOR_CW,  2);
add_motor(AP_MOTORS_MOT_2, -90, AP_MOTORS_MATRIX_YAW_FACTOR_CCW, 5);
add_motor(AP_MOTORS_MOT_3, -30, AP_MOTORS_MATRIX_YAW_FACTOR_CW,  6);
add_motor(AP_MOTORS_MOT_4, 150, AP_MOTORS_MATRIX_YAW_FACTOR_CCW, 3);
add_motor(AP_MOTORS_MOT_5,  30, AP_MOTORS_MATRIX_YAW_FACTOR_CCW, 1);
add_motor(AP_MOTORS_MOT_6,-150, AP_MOTORS_MATRIX_YAW_FACTOR_CW,  4);
Here’s what the code means:
add_motor(AP_MOTORS_MOT_1,  90, AP_MOTORS_MATRIX_YAW_FACTOR_CW,  2);

AP_MOTORS_MOT_1 - This is the motor number as outlined on the frame type page for APM.
90 - this refers to the motor's position in degrees, relative to the flight controller.
AP_MOTORS_MATRIX_YAW_FACTOR_CW - this calculates the yaw factor and applies it to the motor. Replacing this with '0' will result in no yaw being applied to the motor.
2 - the order in which motors will be tested in the 'motor test' mode. The motors should test in a clockwise direction, starting at the front or front-right motor.
Further information can be found in the AP_MotorsMatrix.cpp file.
What we want to do is replace “AP_MOTORS_MATRIX_YAW_FACTOR_XXX” with the number 0. This will disable yaw for these motors. Referring to the motor mapping chart, we want to remove yaw mixing for motors 1 and 2. The updated file should look like this:
// X frame set-up
add_motor(AP_MOTORS_MOT_1,  90, 0, 2);
add_motor(AP_MOTORS_MOT_2, -90, 0, 5);
add_motor(AP_MOTORS_MOT_3, -30, AP_MOTORS_MATRIX_YAW_FACTOR_CW,  6);
add_motor(AP_MOTORS_MOT_4, 150, AP_MOTORS_MATRIX_YAW_FACTOR_CCW, 3);
add_motor(AP_MOTORS_MOT_5,  30, AP_MOTORS_MATRIX_YAW_FACTOR_CCW, 1);
add_motor(AP_MOTORS_MOT_6,-150, AP_MOTORS_MATRIX_YAW_FACTOR_CW,  4);
Save the file and move onto step 6 in the Pixhawk compile guide. Use the command make px4-v2-hexa to build the hexa firmware. It can take a while – around 15 minutes for my PC.
IMPORTANT: Be sure you set the FRAME parameter to ‘1’ to tell APM to use the ‘X’ motor mix.
Enjoy!
This is immensely helpful, I have been looking for some detail on custom motor and yaw mixing in APM for a while. Thank you very much!
Glad I could help, thanks for commenting 🙂
I’m switching to the Pixfalcon on my Vampire. Now you say this guide is not required and you should use the standard hexi firmware. What about the motor setup? Should they remain the default Vampire spin direction (ie middle motors have the same spin as front motors) or should they be changed to standard hexi?
Hi Brian
As you’ll be running Pixfalcon, you must use the APM motor layout and spin directions as this is what the flight controller is expecting. Refer to this wiki page: http://ardupilot.org/copter/docs/connect-escs-and-motors.html — you want to use the ‘Hexa X’ layout.
I have customized my firmware in the fashion described in this article to customize the boom angles on the motors and have been getting good results with this. Please see below for my customization:
// X frame set-up
add_motor(AP_MOTORS_MOT_1, 90, AP_MOTORS_MATRIX_YAW_FACTOR_CW, 2);
add_motor(AP_MOTORS_MOT_2, -90, AP_MOTORS_MATRIX_YAW_FACTOR_CCW, 5);
add_motor(AP_MOTORS_MOT_3, -45, AP_MOTORS_MATRIX_YAW_FACTOR_CW, 6);
add_motor(AP_MOTORS_MOT_4, 135, AP_MOTORS_MATRIX_YAW_FACTOR_CCW, 3);
add_motor(AP_MOTORS_MOT_5, 45, AP_MOTORS_MATRIX_YAW_FACTOR_CCW, 1);
add_motor(AP_MOTORS_MOT_6,-135, AP_MOTORS_MATRIX_YAW_FACTOR_CW, 4);
}
Hope this helps!
I have a Paris V5r1 that I am trying to MPNG running on a deadcat frame. I have set the compass orientation in Mission Planner to ROTATION_YAW_270 as recommended on the Multiwiicopter product page but my craft orientation is displayed as 180 degrees off.
What did you set your compass orientation to in Mission Planner?
As you are the only person I have found who is running MPNG on the Paris V5R1 any advice you could offer with the setup would be much appreciated.
Cheers, Jia
Hi Jia
Unfortunately I have replaced my Megapirates board with a proper Pixhawk, but here’s my notes:
“Compass needs to be set to YAW 90 assuming the compass sensor is pointing to the REAR of the copter (aka, opposite to the direction of the IMU)
After changing this setting you must re-calibrate the compass.
Note: If LOITER doesn’t work, get a phone with compass and line it up with the airframe. It should show the same ‘degrees heading’ number as in Mission Planner within 5 or 10 degrees. If it’s off by 45 degrees or more, adjust the offset (eg YAW 180 or YAW 270) until they match. Note you will have to RE-CALIBRATE each time you change the setting. So the process is … change setting, calibrate, compare with iphone/android phone compass, repeat.”
Been setting up a scarab with the pixhawk but have elected to use the px4 flight stack firmware instead of arducopter. Looking at your motor mapping chart above, I think you might have more success setting the correct arm angles (45 degree rather than 30) and you need to change the yaw factor for motors 1,3,4&6. As the scarab uses the diagonally opposite motors to effect yaw they have to be turning in the same direction ie motors 1&4 CCW and motors 3&6 CW
Thanks for your reply! I haven’t used the PX4 stack. I’ve been hearing more about it lately though, I will need to look into it. I like your idea of changing the arm angles – that hadn’t occurred to me. Currently my Vampire is flying very nicely, however there is always room for improvement, so the next time I am doing some work on the params I will give this a shot.