I’ve been flying my Skywalker Carbon for two years now, it was my second FPV plane, the first being a delta wing. I prefer the design of the skywalker due to it’s landing gear. I find hand launching a heavy delta wing can be very difficult and you really need a decent landing strip which I rarely have access to.
When I built the Skywalker I didn’t really know what I wanted to do with it, so I assembled it first and then fitted the electronics later. This meant that everything was messy, wiring was too long, and it was held in with tape and velcro.
Recently my landing gear has started to fail – more specifically, the fuselage the landing gear is attached to. After two years of landing on pretty rough terrain like dirt roads, the small piece of balsa had begun to tear the foam away, and failure was imminent.
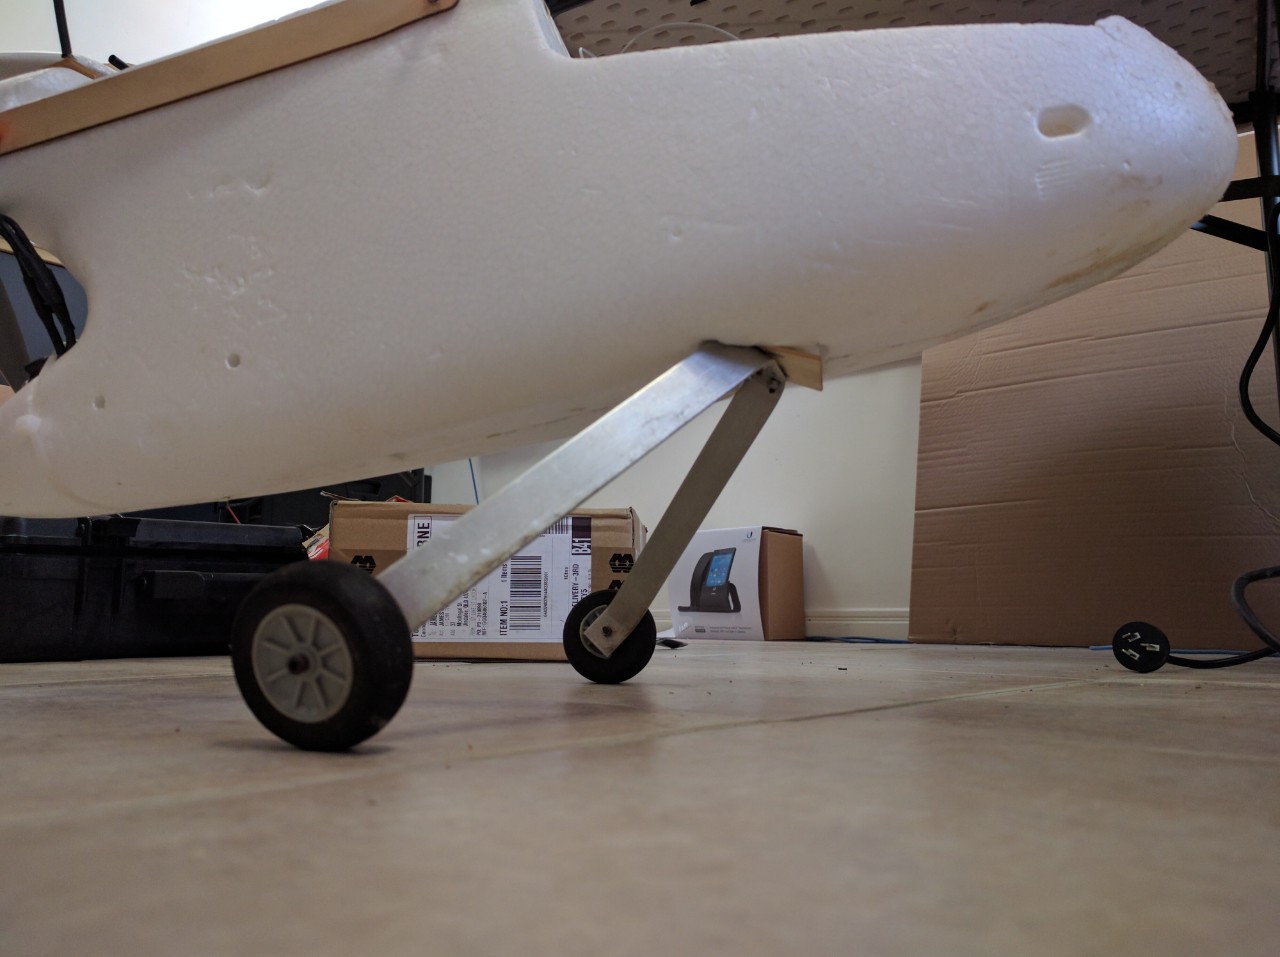
The gear were straight when I first built the plane. Now it has swagger.
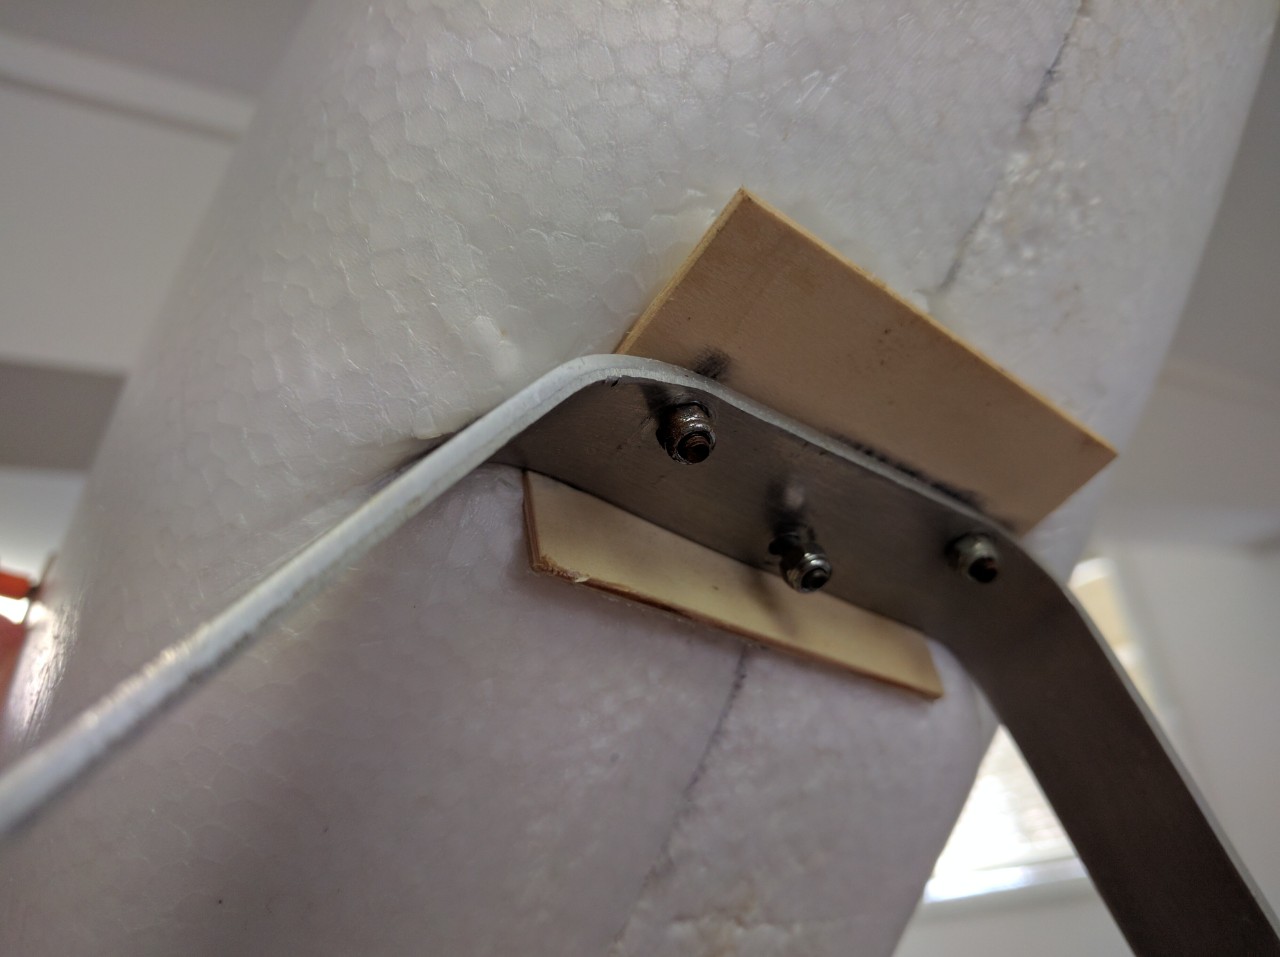
The balsa has folded and the foam has cracked and was ready to be torn away.
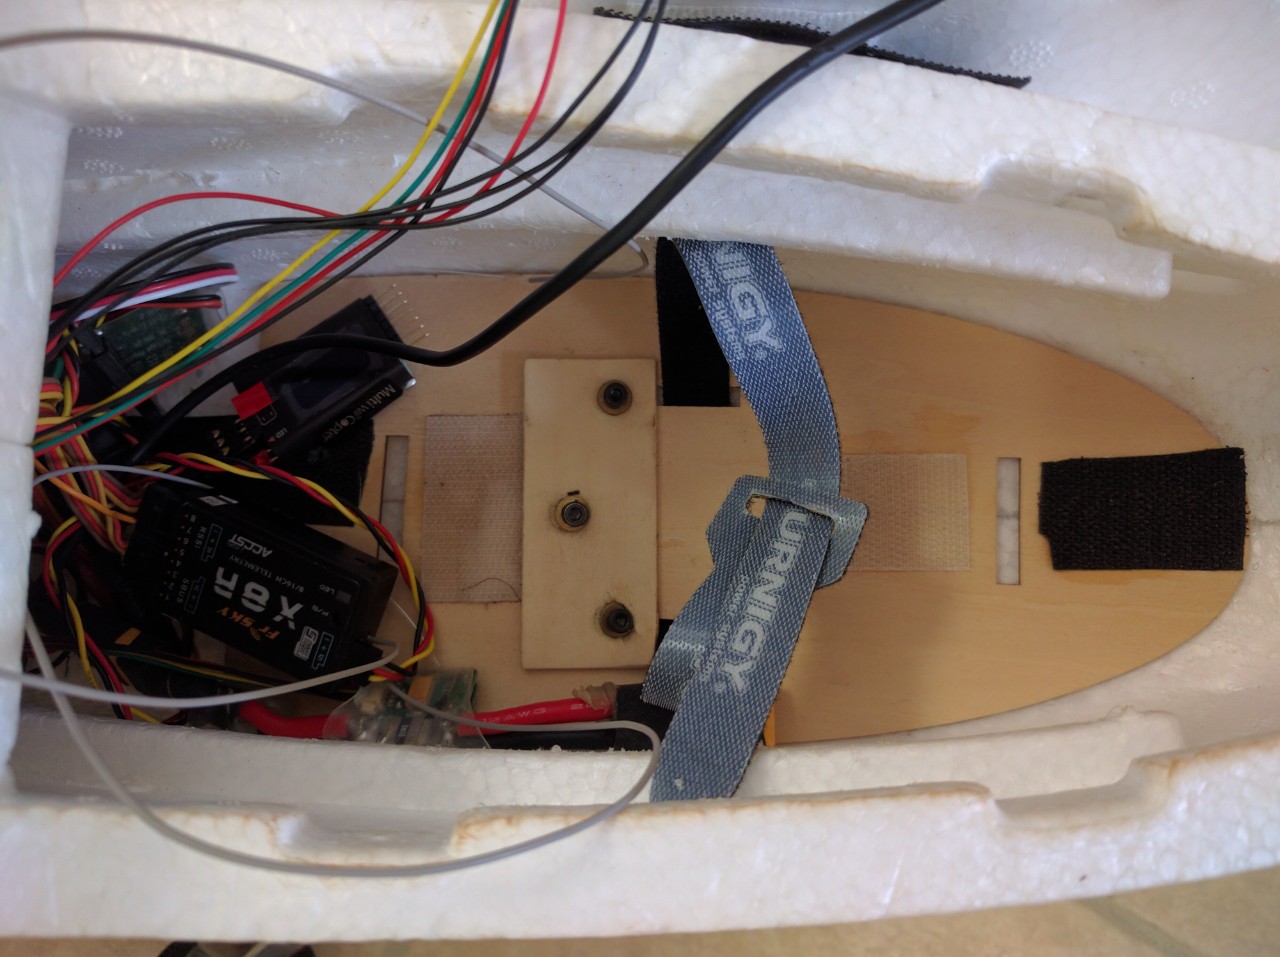
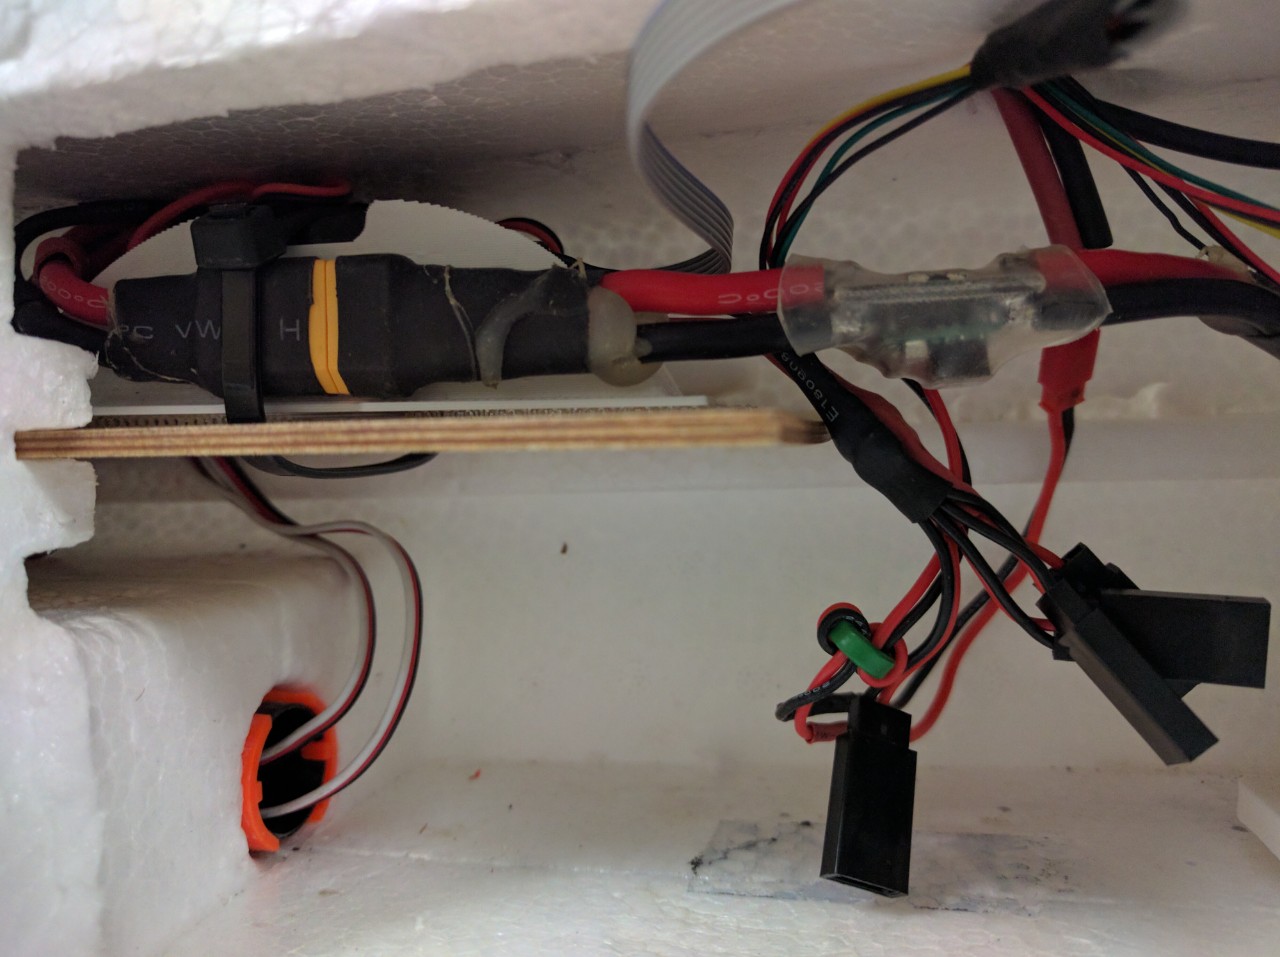
Inside the fuselage where the battery lives, you can see some of the mess of electronics toward the rear.
I decided that I would design and 3d print some new landing gear which would suit the plane better than the metal ones, and do a tidy-up of the planes electronics as part of the process. Firstly I did some sketches of what I wanted it to look like and how the different pieces would fit together.
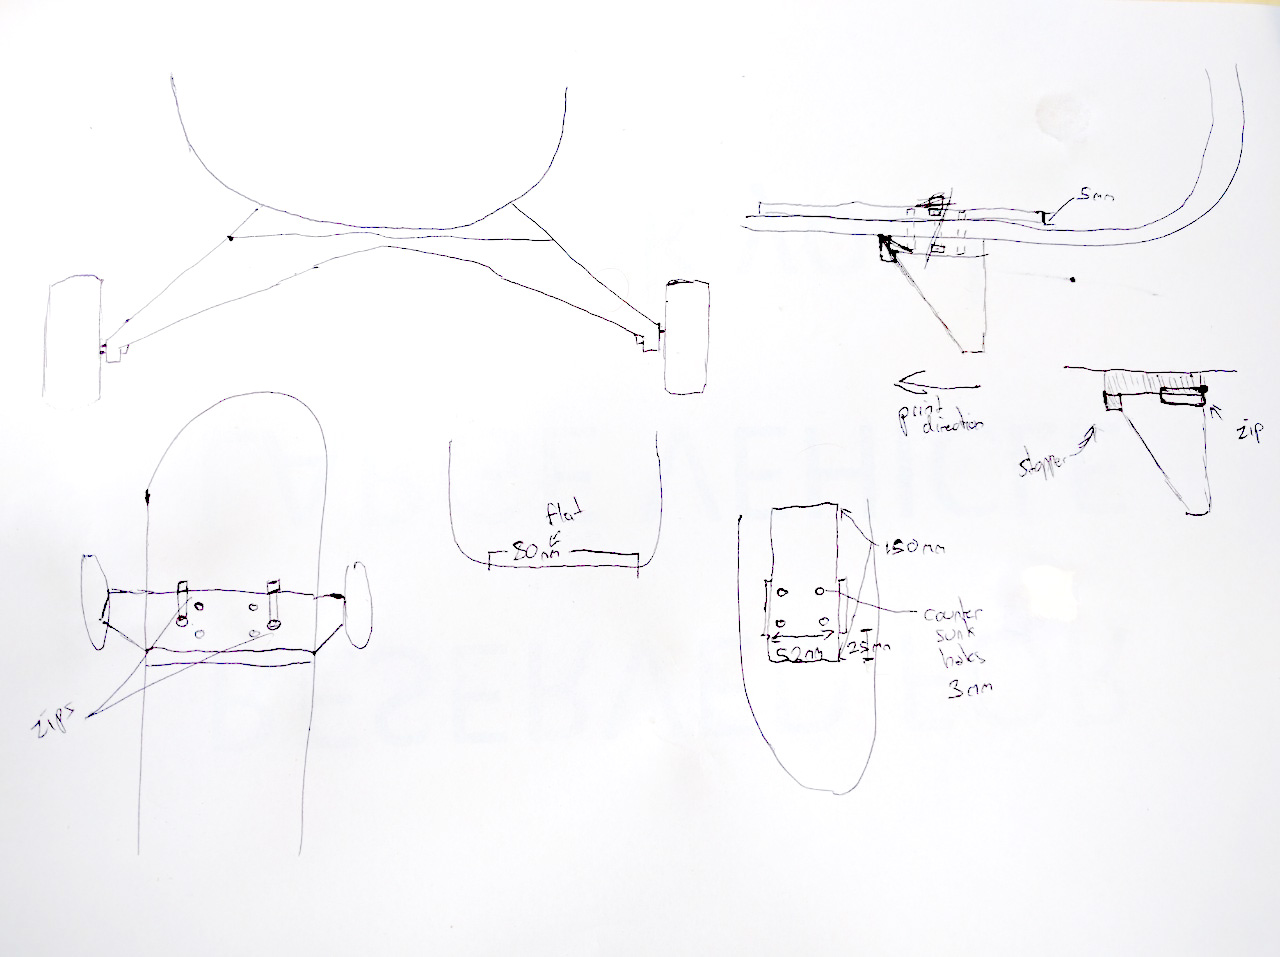
Sketching saves time in the design process by helping me to work out dimensions and how the finished product will be printed.
My design goals for the landing gear were:
- Be strong enough to handle rough surfaces.
- Spread the stress of landing across the foam to avoid further damage to the fuselage.
- Be quickly replaceable if it breaks, and/or break-away from the fuselage in the event of a hard landing.

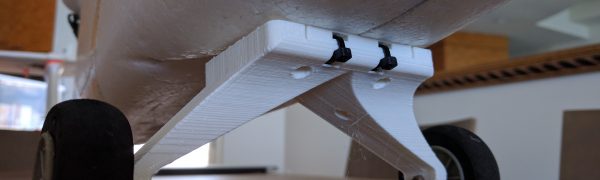
I designed the gear in three parts. The lower two parts are held together with zipties through the holes in the front. The ‘hovering’ top plate is what will be mounted inside the fuselage, four bolts will compress the foam between the two plates. The top plate also holds the battery with velcro and strap.
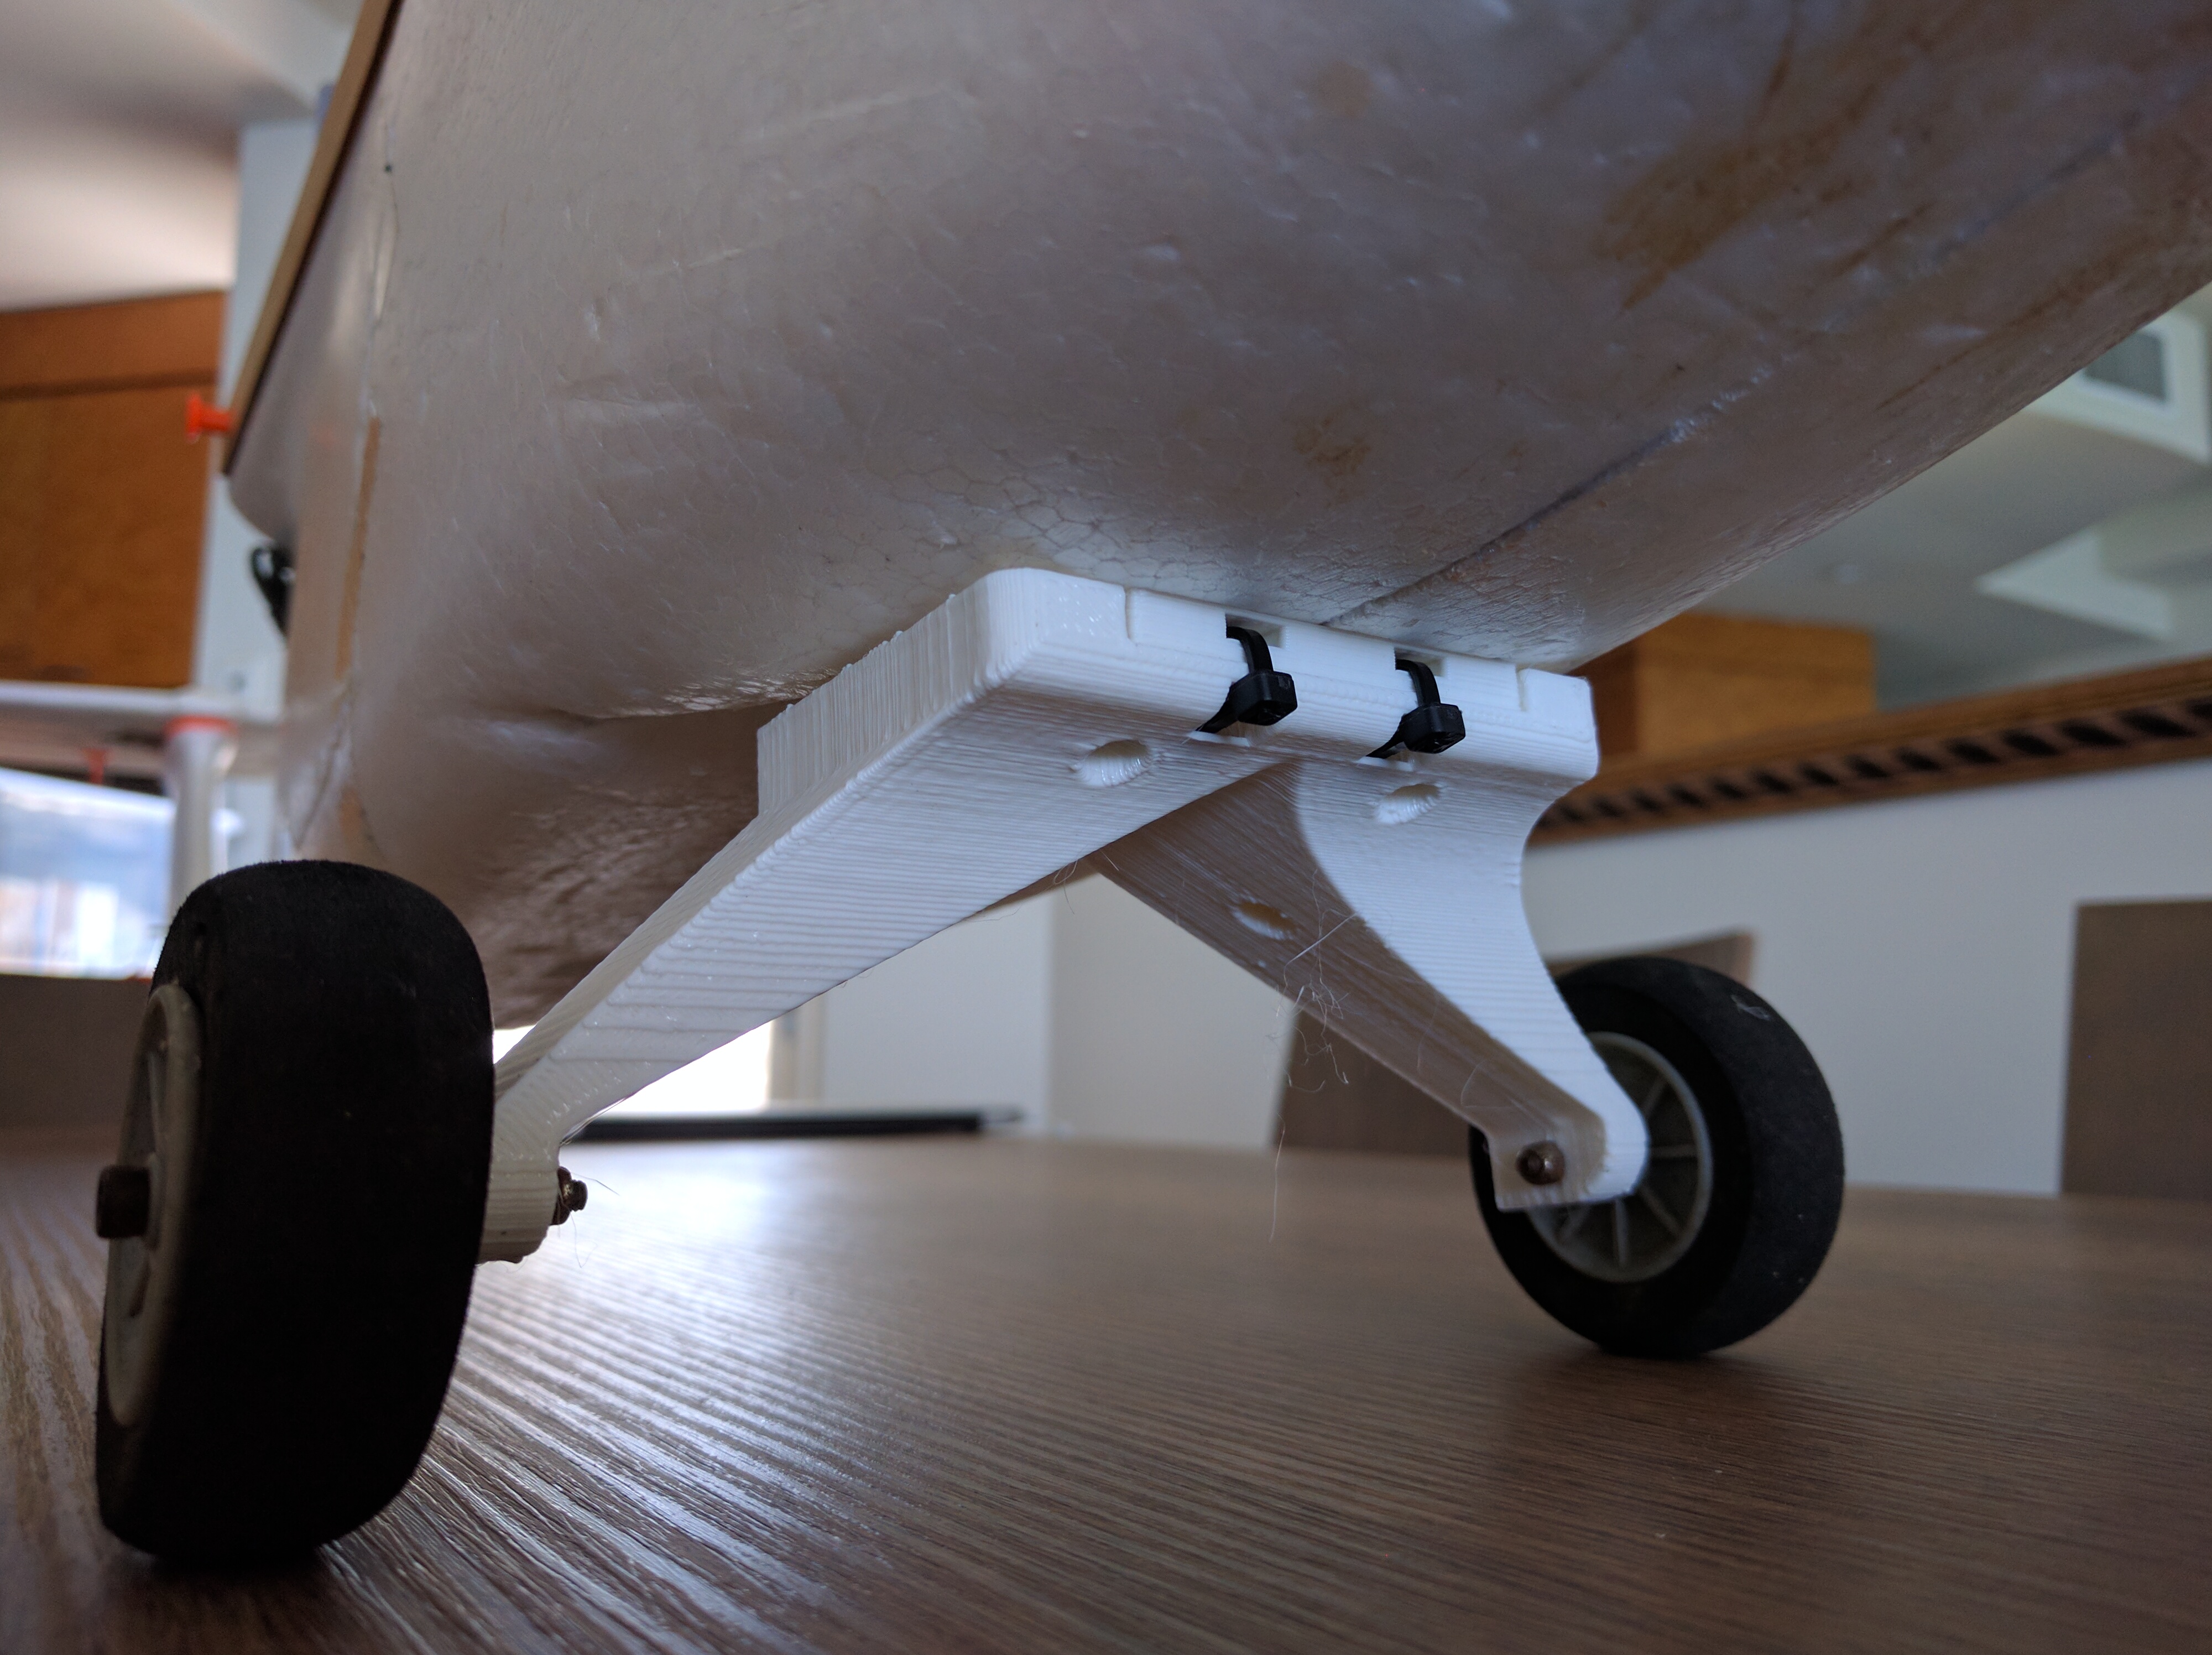
Landing gear finished and mounted! The plane sits a lot lower than before, I am hoping this won’t affect the take off. The new 3d printed gear assembly is also about 15g lighter than the old metal one.
You can download the STL file here: http://www.thingiverse.com/thing:1936544
Next I decided to pull all the electronics out and move all the ‘smarts’ to the top bay of the plane. This is in preparation for my plans to install a gimbal on the nose. When I do this, I’ll need to move the battery far back in the bay to balance the plane properly.
I decided to cut a hole in the side of the plane so I could properly access the fuselage and tidy everything up. Later on I may make a hinge for it, but I don’t expect to have to open it up that often.
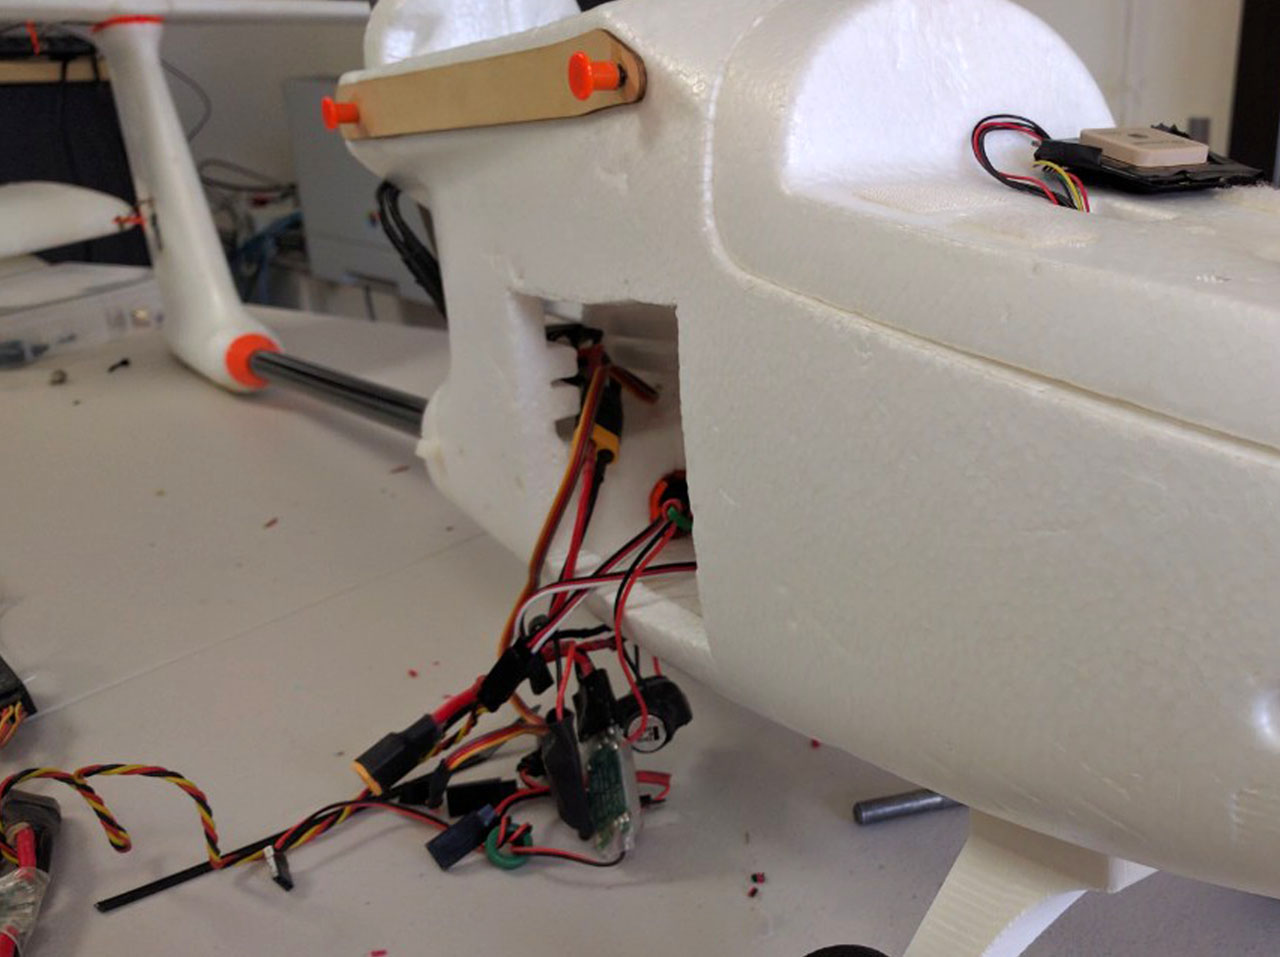
Spilling its guts all over my workbench.
I have three BECs (5v servos, 5v ancillary and 12v fpv) and an APM power module which I wanted to keep tidy and out of the way of the battery. I decided to design and 3D print a little ‘organizer’.
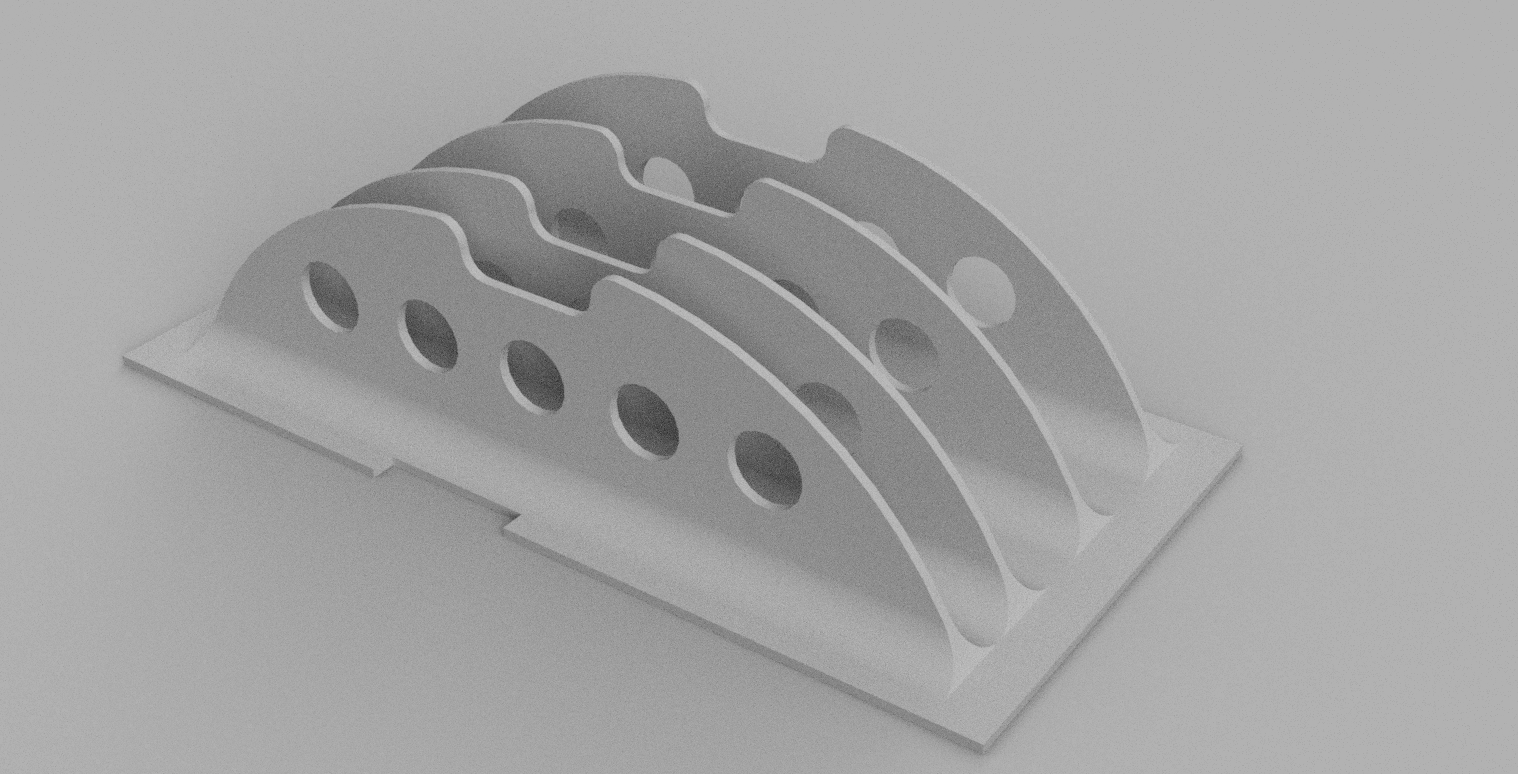
The holes are to allow for airflow to cool the BECs and the tabs along the top are for a zip tie.

Everything sits neatly in the 3d printed organizer. The print weighs only a few grams as the walls are only 1mm thick.
The balsa ‘shelf’ slides into position at the back of the fuselage and allows maximum space for the battery. There’s also an airhole at the back of the fuselage to allow for airflow over the BECs from front to rear.
You can download the STL file here: http://www.thingiverse.com/thing:1936561

I moved the APM 2.5 board and receiver to the top bay of the Skywalker fuselage. I had to change the board orientation parameters and perform an accelerometer calibration after moving the APM. Once I test that everything works OK, I will come back and shorten some of these cables to tidy it up too.
Finally, I upgraded my receiver from an X8R to a L9R for longer range and wanted a better way of mounting the antenna paddles. I found this design on thingiverse and cut a hole to mount the paddles and antenna flush with the foam. It’s held in with a little hotglue.
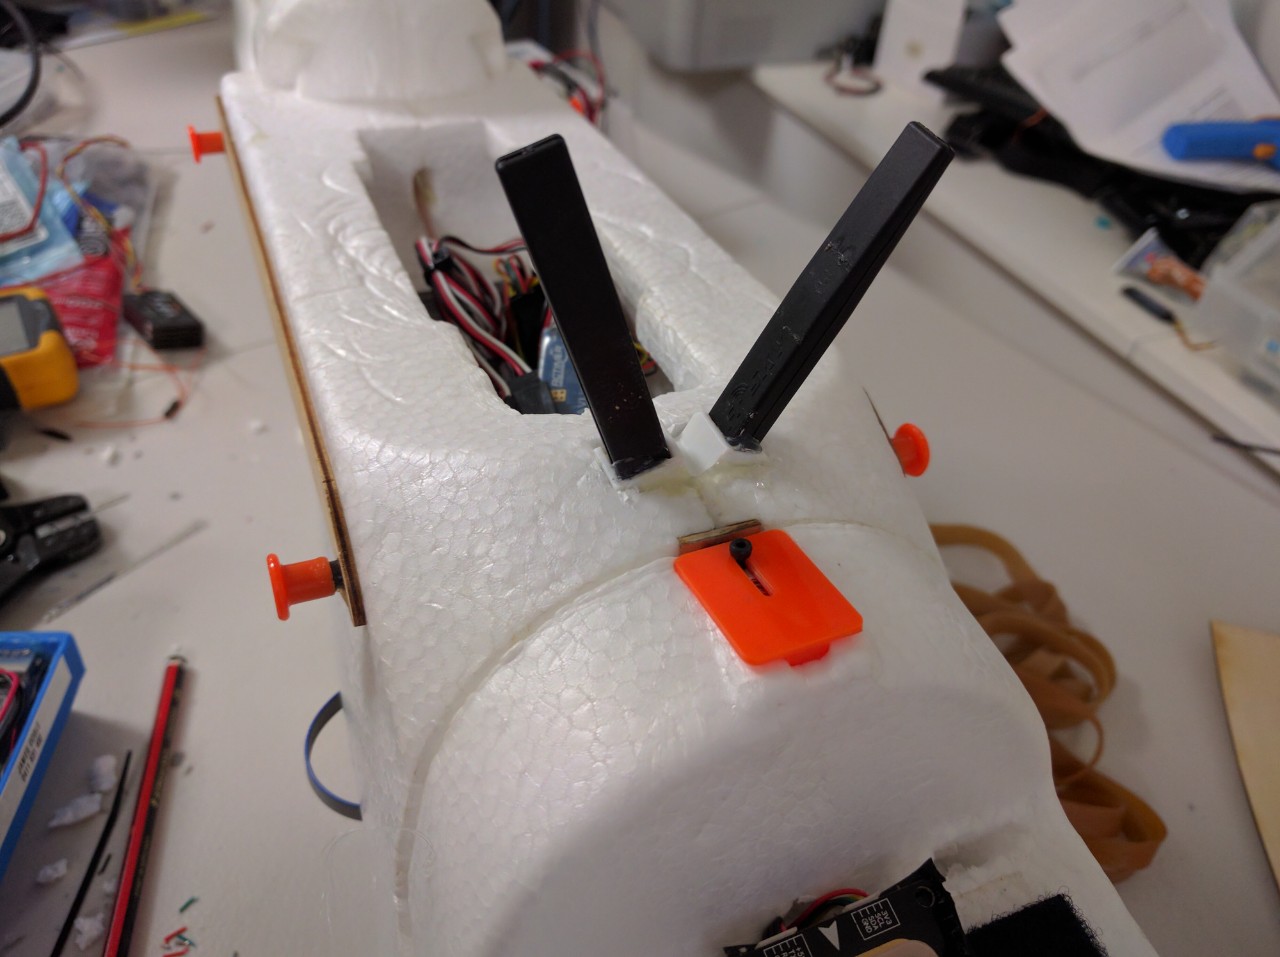
I’m not sure if the rigid mount will survive bumps and knocks, I’m thinking about mounting it on a small hinge so it will fold flat when I’m transporting the plane. We’ll see how it goes.
With these changes there’s now plenty of space for the fuselage to place the battery wherever I want without worrying about damaging the electronics.
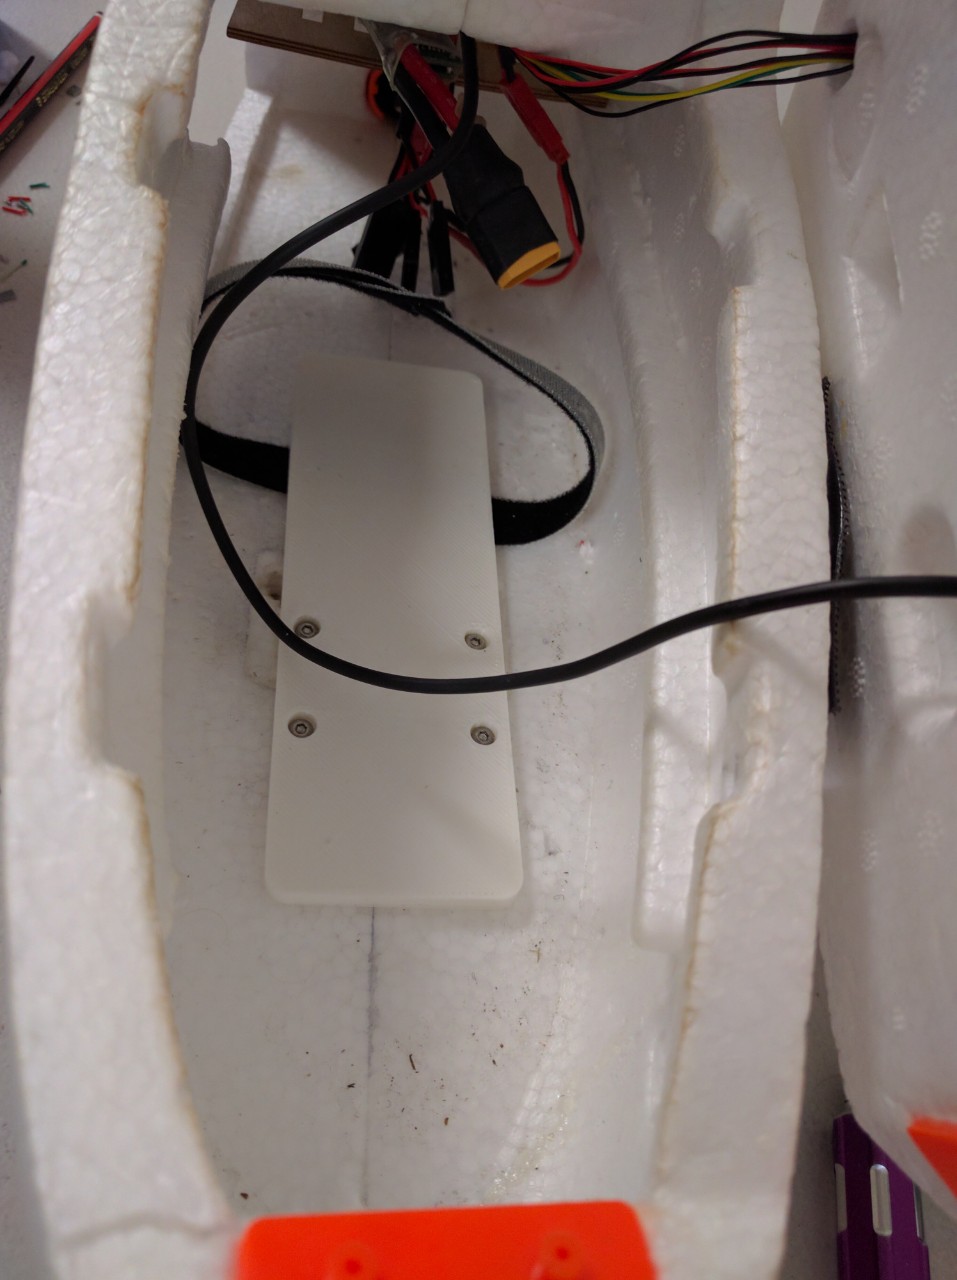
I also mounted a strip of velcro down the middle after I took this photo.
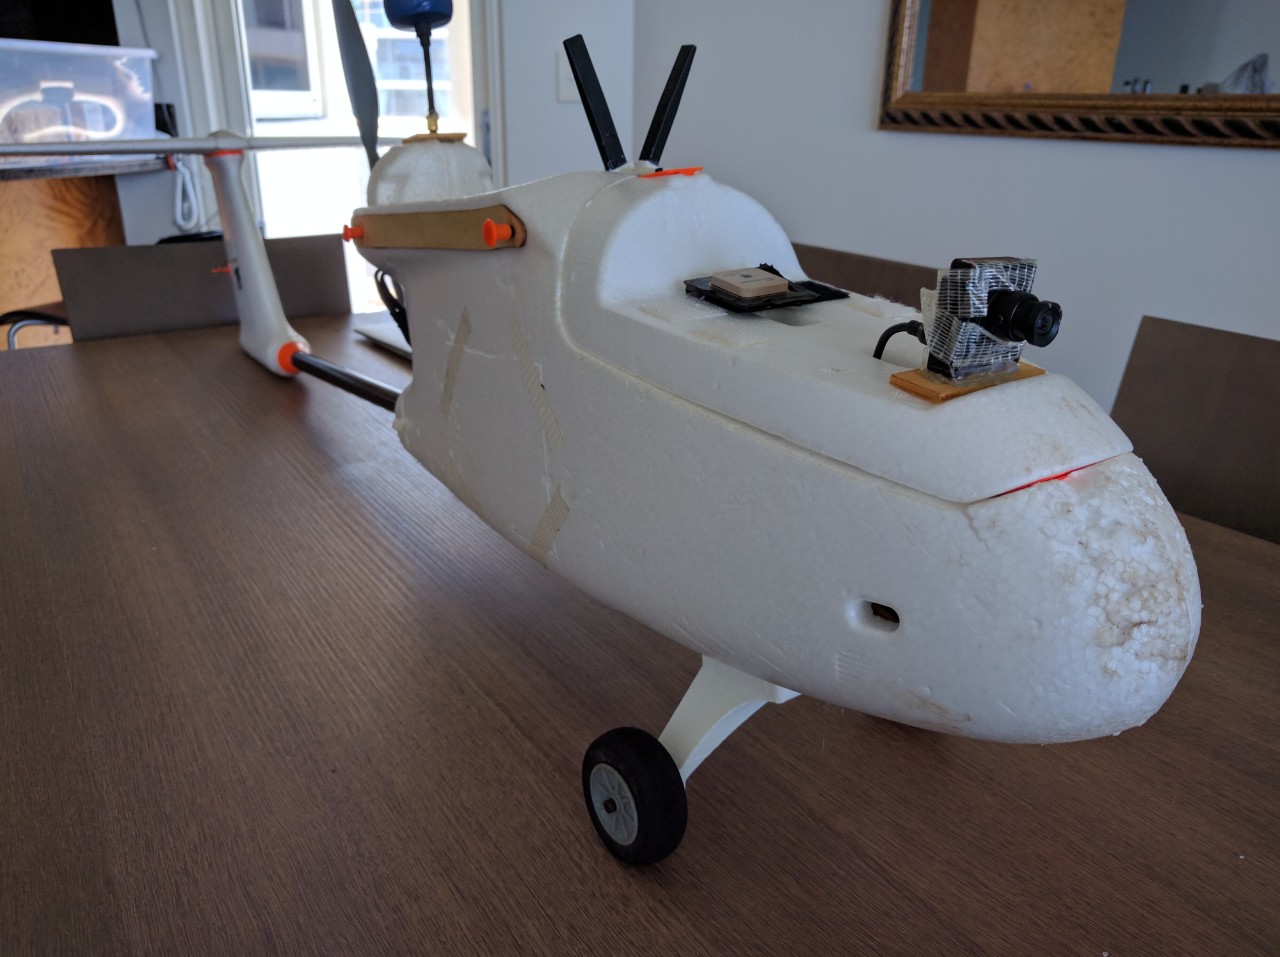
Ready to fly!