Since I got my Delica, I had the idea of doing a trip to the snow – I hadn’t been since I was in highschool.
A diesel air heater seemed like it would work well to keep me warm. I already carry diesel, they’re very efficient on fuel and electricity, and don’t take up much space.
My snow trip was a success, and you can read all about it here (coming soon!). In this post however, I’ll focus on how a diesel heater works, how I installed it, and what I learned along the way.
Please note that I am not a licensed installer, nor an expert, this is simply my experience. You are solely responsible for your own safety.
I suggest checking out the Chinese Diesel Vehicle Air Heaters page on Facebook, it has a huge amount of information and helpful people.
If you’ve already installed your own heater, you may want to skip to my tuning guide.
How does it work?
A diesel air heater burns diesel fuel to create heat. The heater itself is made up of two separate chambers – one for burning fuel, and one for heating the air. A small pump injects tiny amounts of fuel into the burn chamber, where it is first ignited by a glow plug.
Once the heater is up to temperature, the glow plug shuts off, and all that’s needed to maintain the process is air and fuel. The air for burning fuel is sucked in from outside the vehicle, and exhausted back outside. The air to be heated is recycled in the cabin, making it very efficient.
The two separate chambers make diesel heaters quite safe when installed correctly, short of some catastrophic failure of the chamber separation.
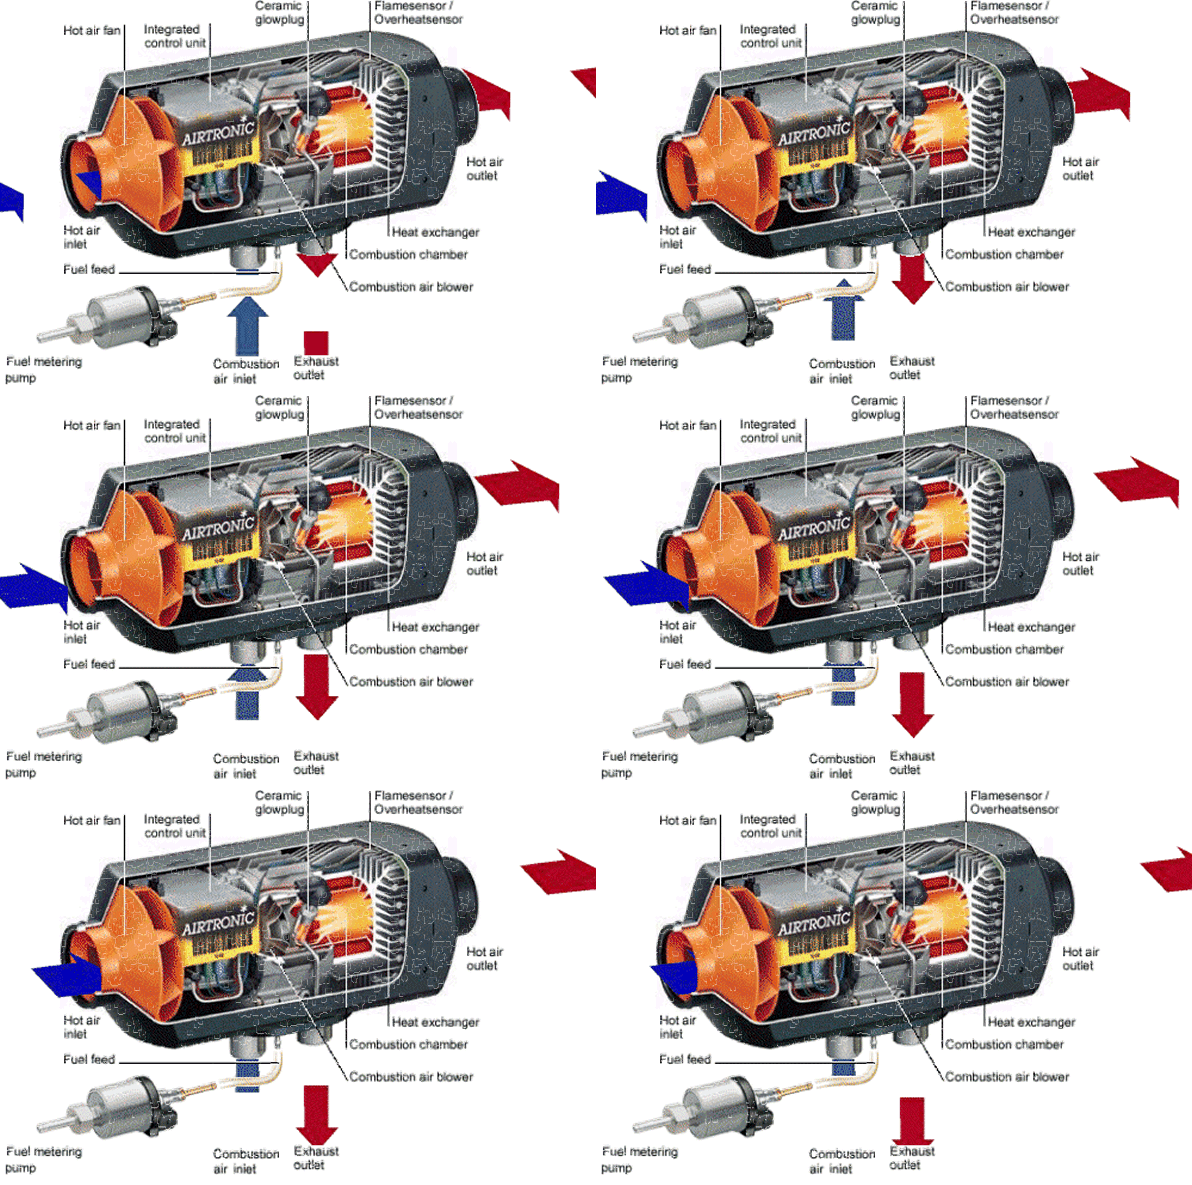
Diesel heaters can put out a significant amount of heat – the most common sizes are 2kw and 5kw. For comparison, the largest electric heater you can buy that runs off a normal Australian power socket puts out 2.4kw of heat, so the diesel heaters are putting out a lot of power for a small space!
There are well known brands like Eberspacher that produce diesel air heaters ($1500-2500 AUD), and there’s also ‘chinese clones’ which are significantly cheaper. ($200-$300 AUD) I bought my clone from eBay as a ‘3kw’ kit, that came with the heater, pump, controller, some piping, and screws and clamps. The information herein is based on my experience with this unit.
Picking the right size

I didn’t realize this at the time, but ‘3kw’ heaters are actually just electronically de-tuned 5kw units. This is a problem in a very small space like my Delica, because diesel heaters don’t easily ‘shut off’ – there is a minimum amount of fuel required to keep them running, and they will always produce this minimum amount of heat.
This means that if you want a heater for a small space like a campervan, I suggest buying a 2kw as it will be able to run at a lower minimum power level due to its smaller burn chamber.
I’ve had occasions where i’ve turned my heater on with the lowest setting, only to be sweating 10 minutes later because it just puts out too much heat, I have to open the window to keep things at a reasonable temperature.
It is possible to turn the heater off when it reaches a certain temperature, but then the heater has to purge its fuel and shut down, which takes a few minutes and is noisy. Then, when the temperature drops, you have to re-start the heater which is again noisy, and also uses a bit of power due to the glow plug
Where to install it?
I planned the install as part of my desire to add more storage, and upgrade my electrics and batteries. You can read more about that here. (coming soon)
I sort of ‘got lucky’ with my installation choice, in that I avoided a number of potential problems which I wasn’t aware of until after the build was complete.
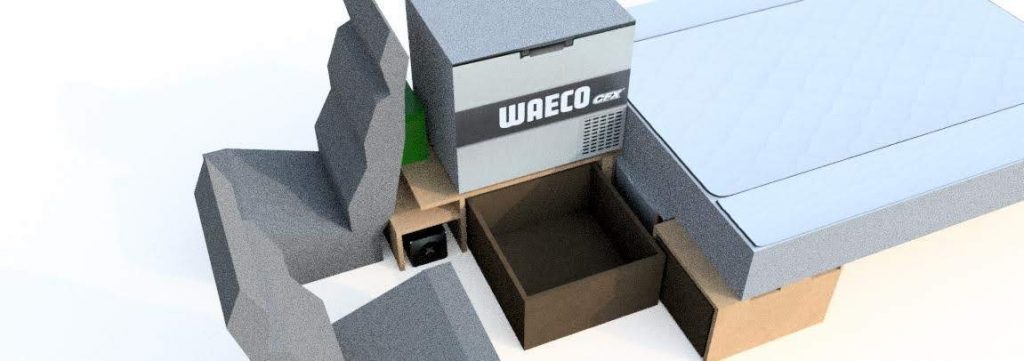
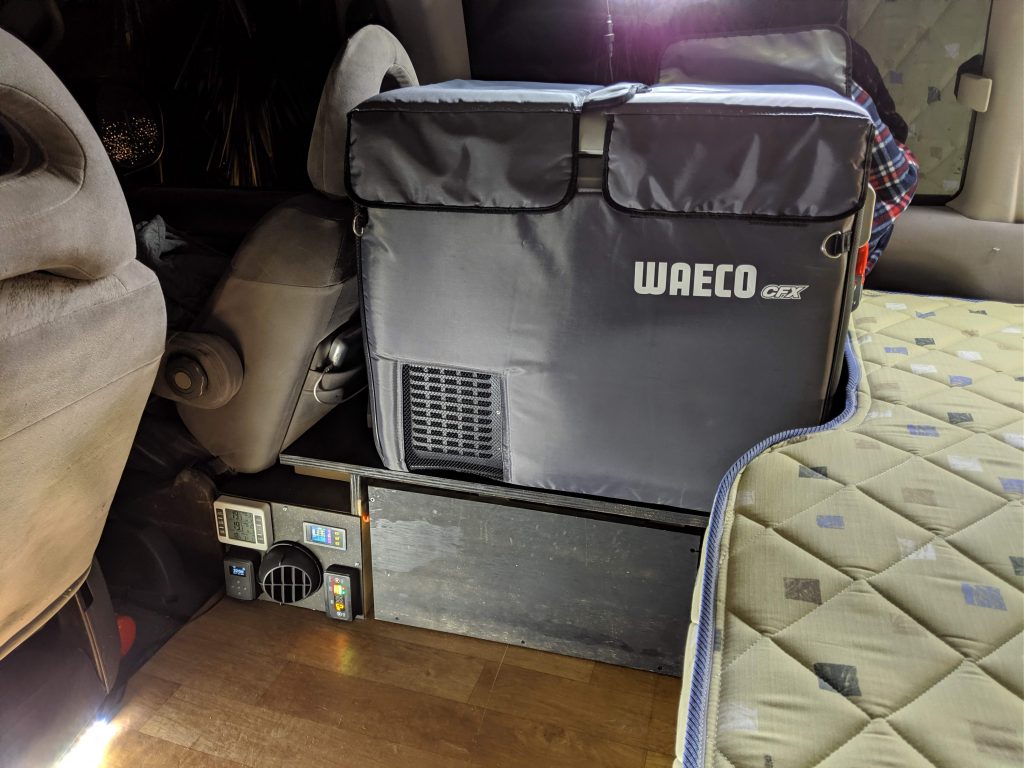
The heater would be installed behind the drivers seat, under my fridge.
The main thing I didn’t consider was the extreme temperature of the air exiting the heater. It’s extremely hot! When the heater is running, I can’t hold my hand in front of it for more than a second or two. It’s great for warming up chocolate though 😉
For this reason, I strongly suggest installing the heater vent somewhere that nothing flammable can fall in front of it, like blankets for example.
The good news is that the casing of the unit itself barely gets warm. The installation manuals I’ve seen often suggest a 20mm gap on the sides and top, but I left 50mm to be safe. In hindsight, this seems like overkill.
Another important thing to consider is access to the unit. You will eventually have a problem with it, and will need to access the unit and remove the case to perform maintenance. The most common problem is a blown fuse, or a damaged glowplug.
Be sure to install the unit somewhere that you can access it without having to take your van apart – remember it will most likely fail when you’re in the middle of a trip, in the cold, without any tools!
Safety first
There’s two main risks when it comes to diesel heaters. Fire, and poisoning.
Hot spots on the heater include the mounting plate that joins to the floor, the exhaust pipe, and the hot air outlet, including any ducting and vents. Avoid tight corners in ducting lest you end up with hot spots and potential problems with burn chamber temperature.
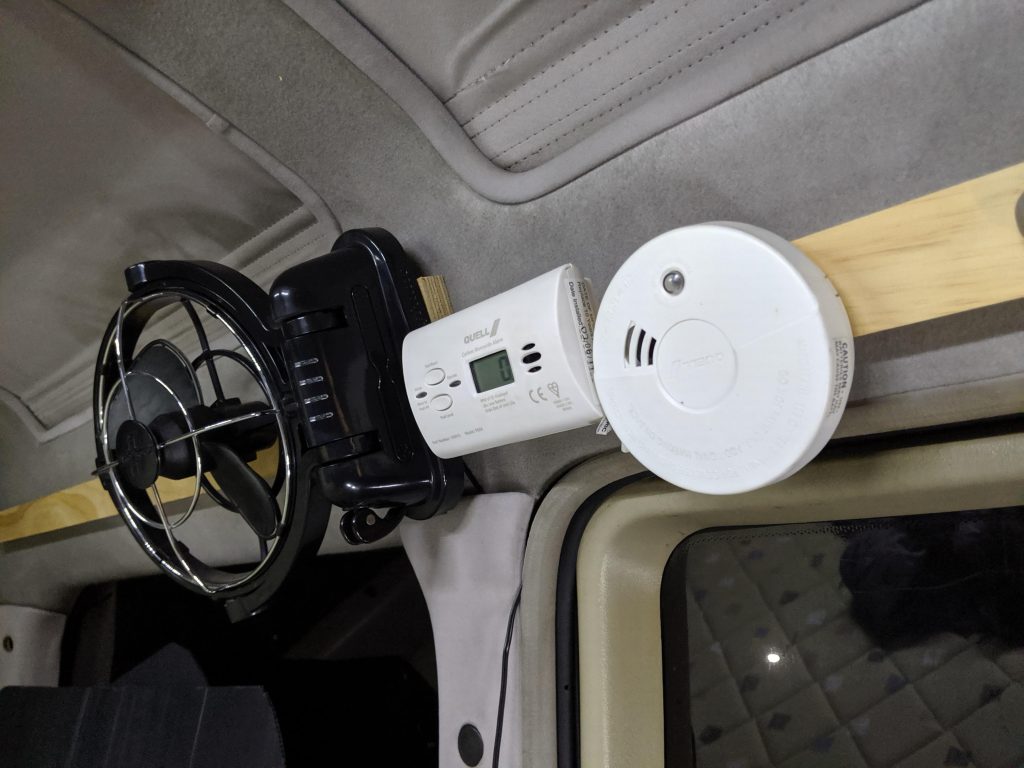
Be sure all of these hot spots are well insulated and/or located away from flammable materials. Purchase a smoke alarm as well.
Poisoning is a real concern with these heaters, mainly due to how they are tuned. I’ll explain more about this later, but you must, must, MUST invest in a Carbon Monoxide alarm with a display. In fact, I bought two from different manufacturers. Carbon monoxide is odorless and colorless – you can die in your sleep, or even while sitting awake and alert. Your life is worth the $60 AUD !
Remember, be cool about fire safety!
Installing the heater
This isn’t intended to be a how-to guide – there’s plenty of instruction manuals and resources online that cover that, I will just be going over my own install and some of the things I learned from my mistakes.
The first mistake I made happened before I started the install. I should have opened the unit up and checked if the glow plug was secure. I now know that this is a common fault and can cause the units to not fire up, or cause gases to enter the cabin! Thankfully, mine seems to be fine, but check yours first.
It’s also a good idea to bench test the system to see that it works before installing. this is because you’ll need to use exhaust cement to install and it can be difficult to remove if you find you need to replace it later.
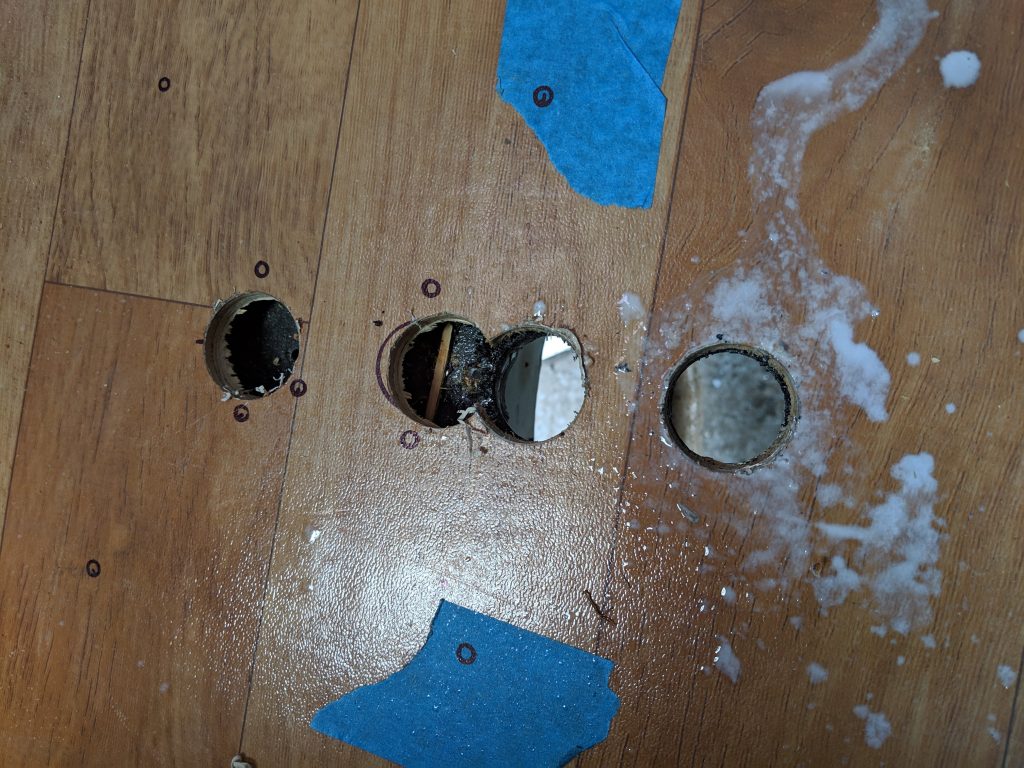
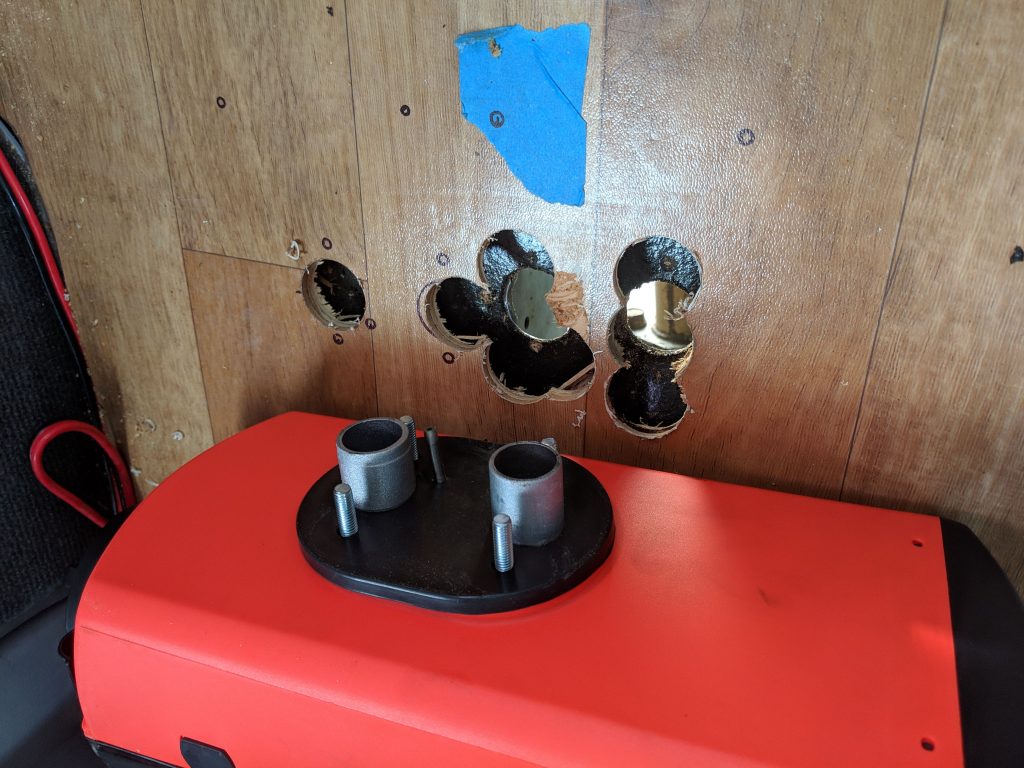
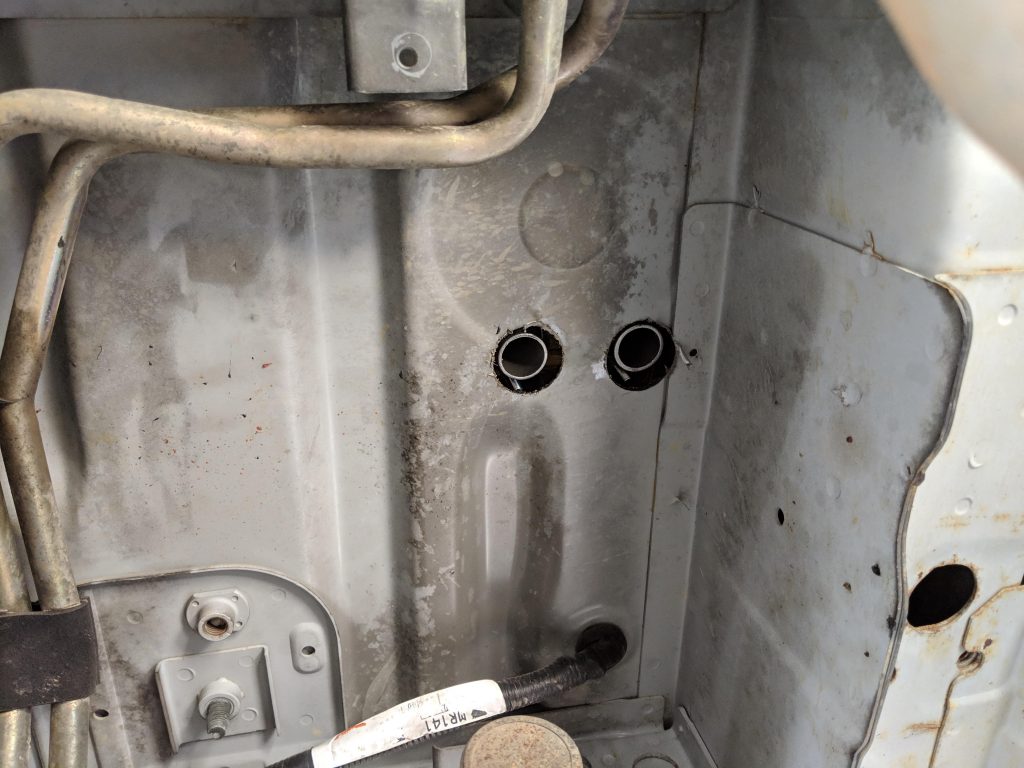
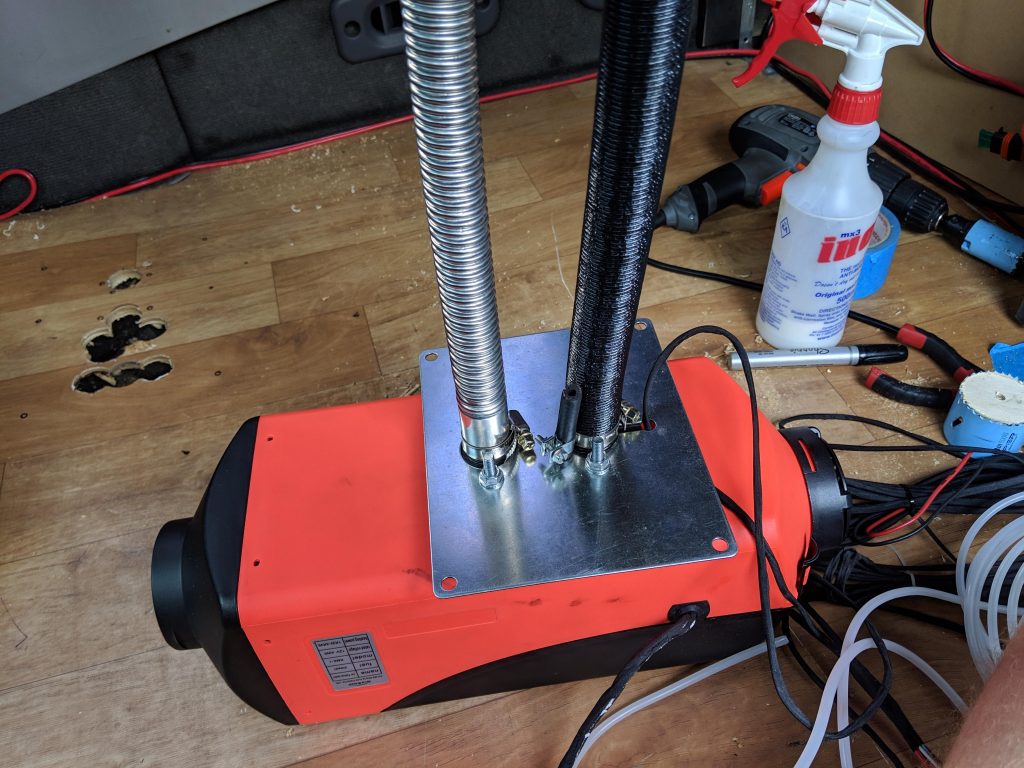
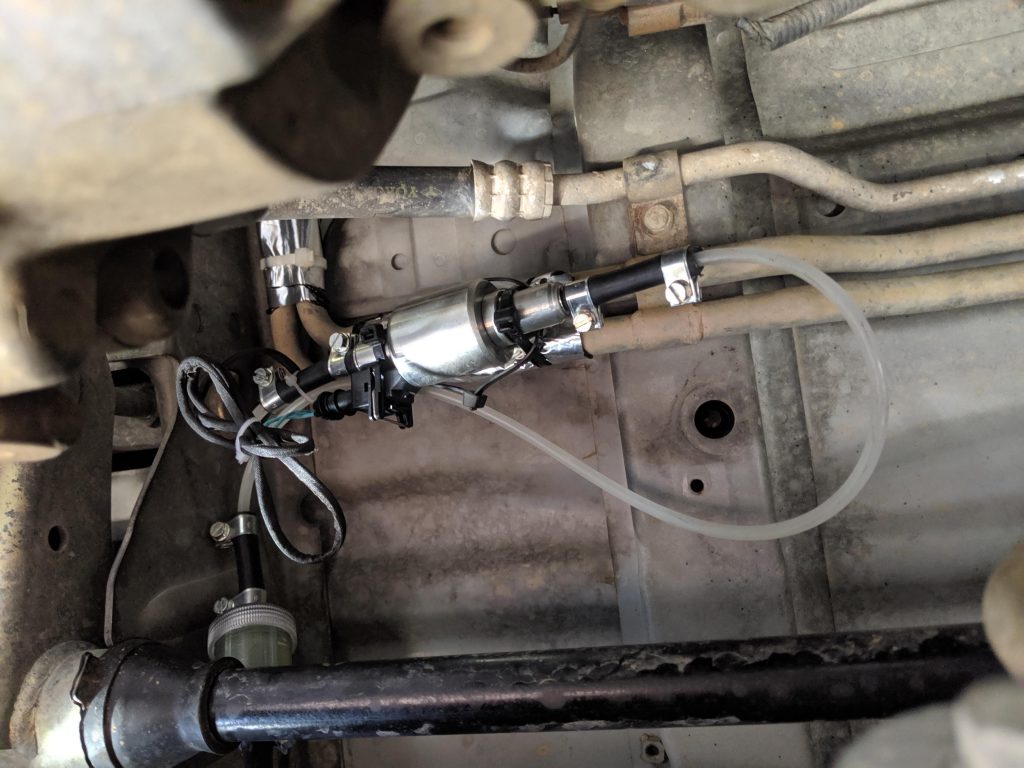
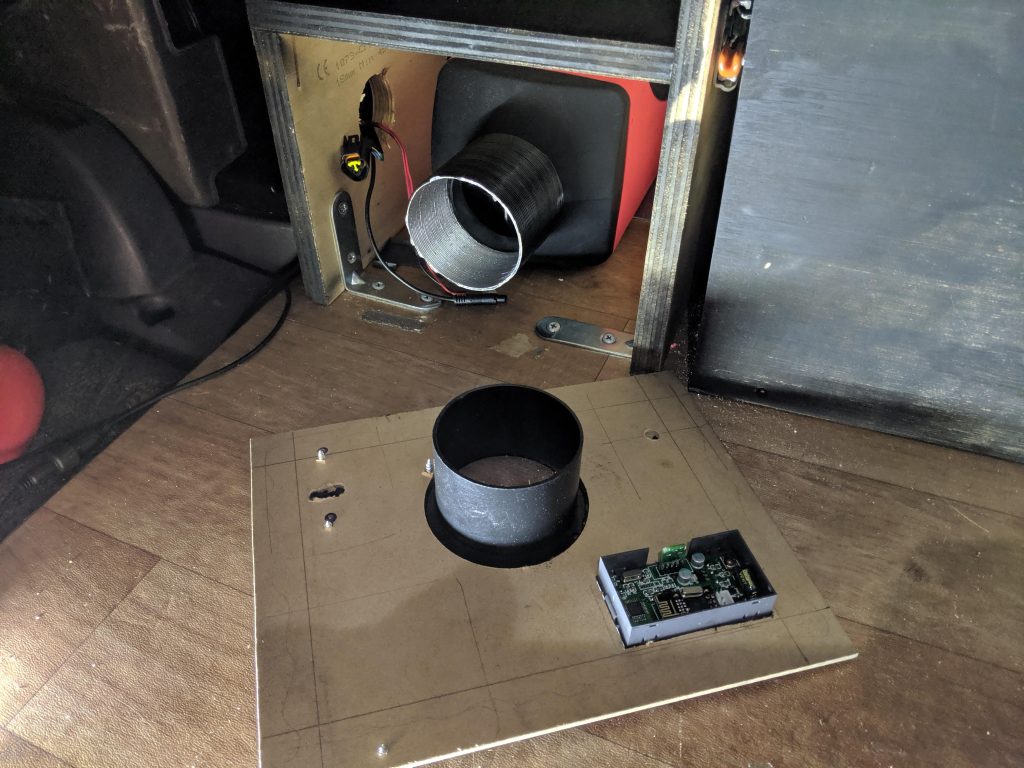
I started by drilling some holes in the wooden floor of my interior, and then through the metal floor of the van. I had to ensure I positioned the heater somewhere that there would be space for the pipes to exit underneath. I fixed the heater to the wooden floor and poked the pipes and wiring out the bottom.
I made two mistakes here:
- I should have cut the wood away completely and mounted the heater to the metal floor. This would have allowed me to create an airtight seal between the floor and the metal fixing plate with some exhaust cement.
- I should have used exhaust cement on the exhaust and air intake pipes, as well as the pipe clamp.
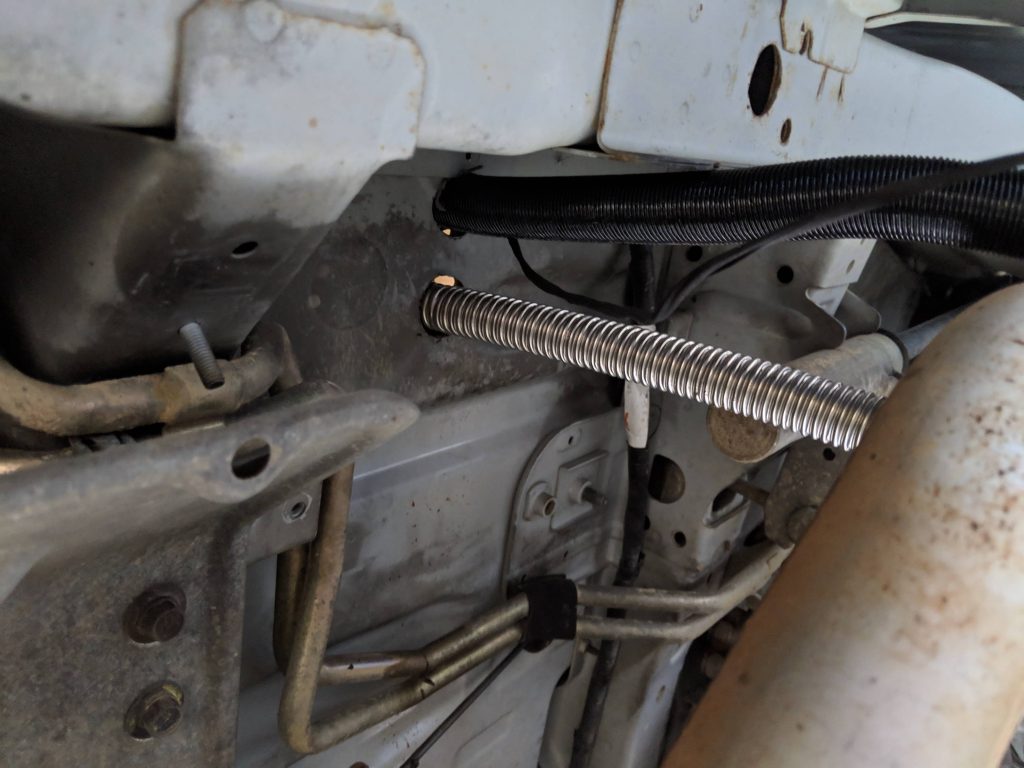
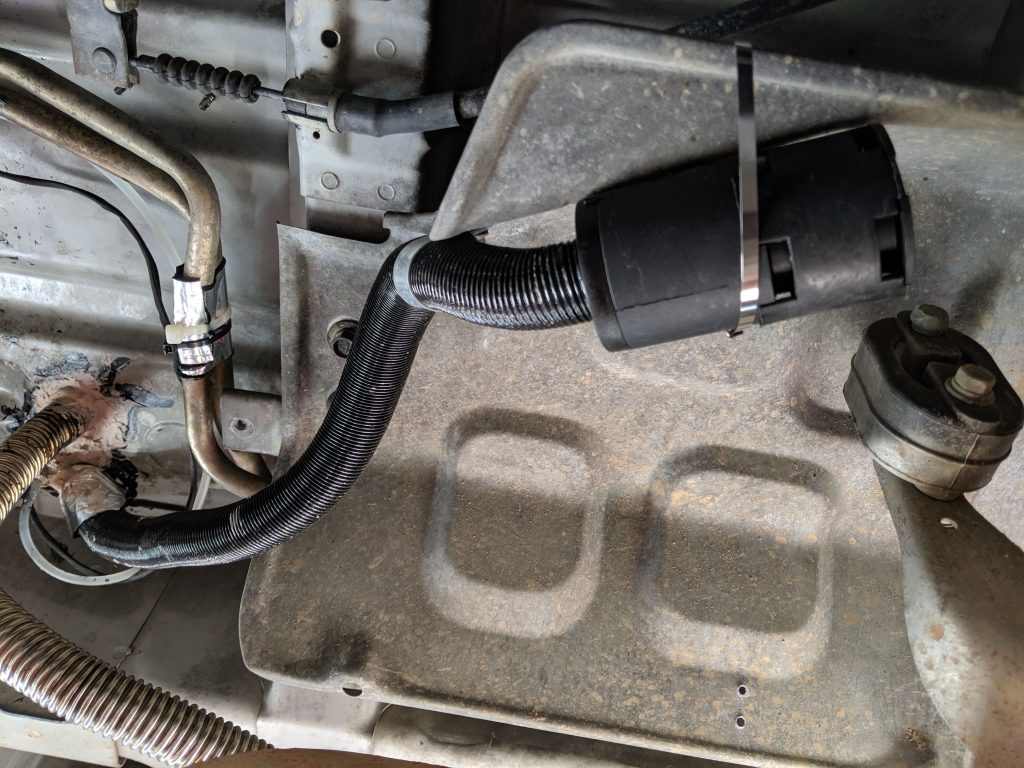
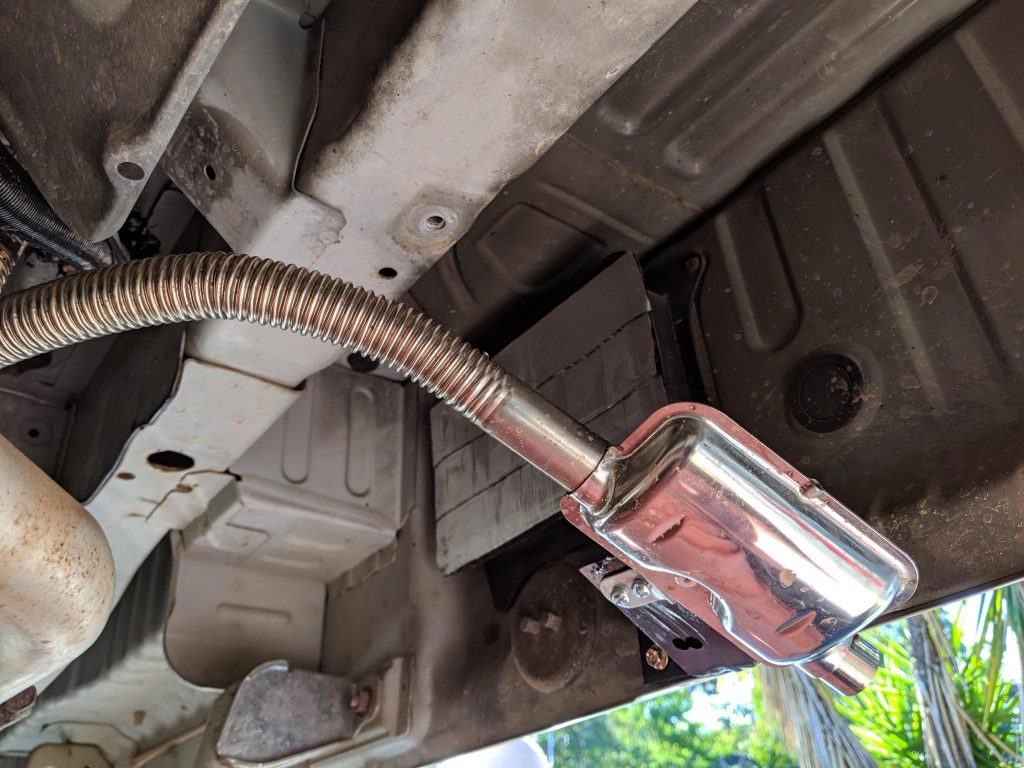
I installed the muffler and made a simple bracket to try to get the exhaust to exit out the side of the van. This worked really well. I also secured the air intake and filter (black piping) and the fuel pump.
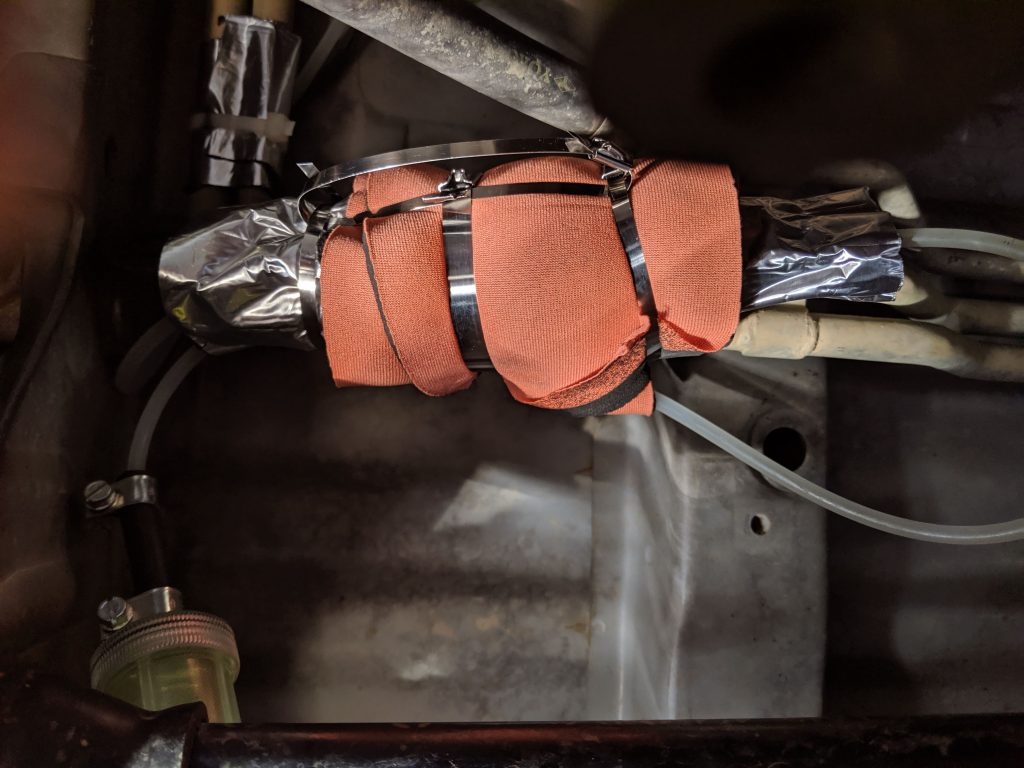
The pump makes a ‘ticking’ noise which can be quite loud when attached directly to the metal shell of the van, so I wrapped it in some neoprene foam and aluminium tape to try to quiet it down. You can still hear the pump if you listen for it, but it’s quiet enough that you don’t notice it, even when sleeping in a silent campground.
I ran the fuel line up over the drive shaft to reach the fuel tank, and secured it with zip ties. I took the van to my friends at Delica Garage Queensland to connect the pump to the Delica’s diesel tank. This would let me run the heater without having to carry a separate tank of fuel.
As usual the guys were happy to help me out with my wild ideas!
I asked them to put in some silicone sealant around the exhaust to create an airtight seal. This was a mistake as the exhaust just gets way too hot, it melted off and we had to remove it and replace it with exhaust cement.
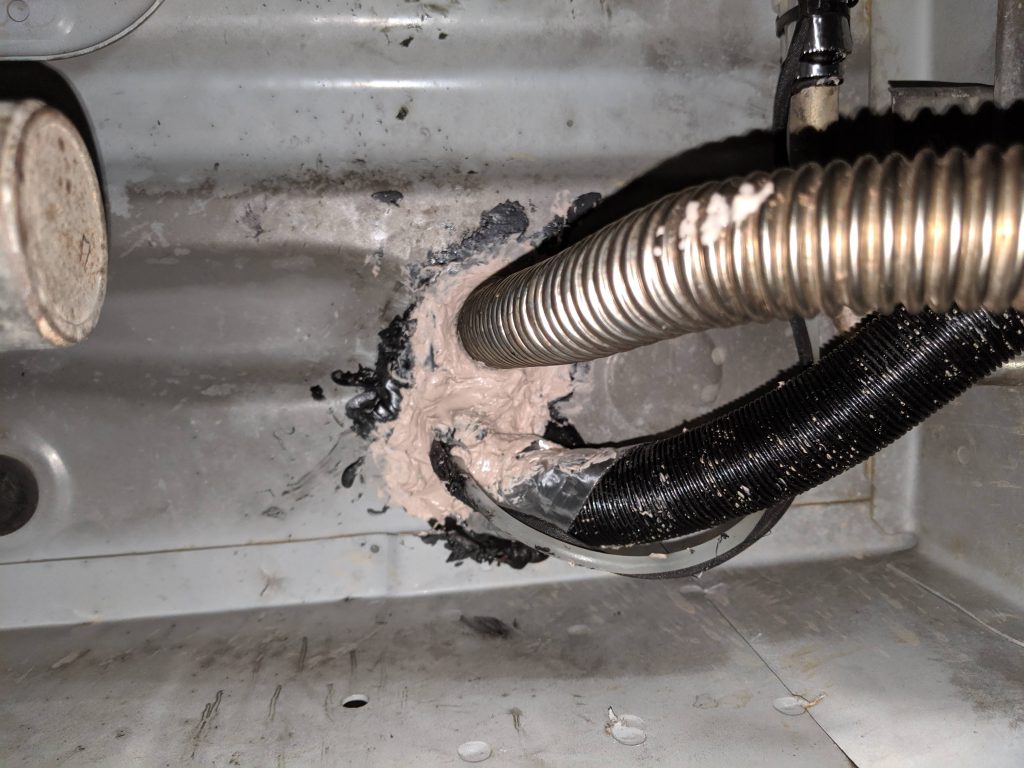
Messy, but it does work. It may fatigue over time so I will eventually re-do this and mount the heater to the metal floor to create a proper seal.
It was time for the test run … fire extinguisher at the ready!
It was a smokey start and I was a bit worried, but after about 15 minutes the smoke cleared and it came good. I think that I had over-primed the system as it’s difficult to see the diesel flowing through the fuel line.
I did some more testing over the next few days to ensure that it wouldn’t set anything on fire. I ran the system on full power for about an hour, as well as on low power and it worked well. I used my CO alarm with display to see if there was any gas leaking into the cabin, and there was none.
Everything was looking good for my snow trip. The last thing I did before I left was to purchase a new controller. The chinese controller that is included in the kit is very basic.
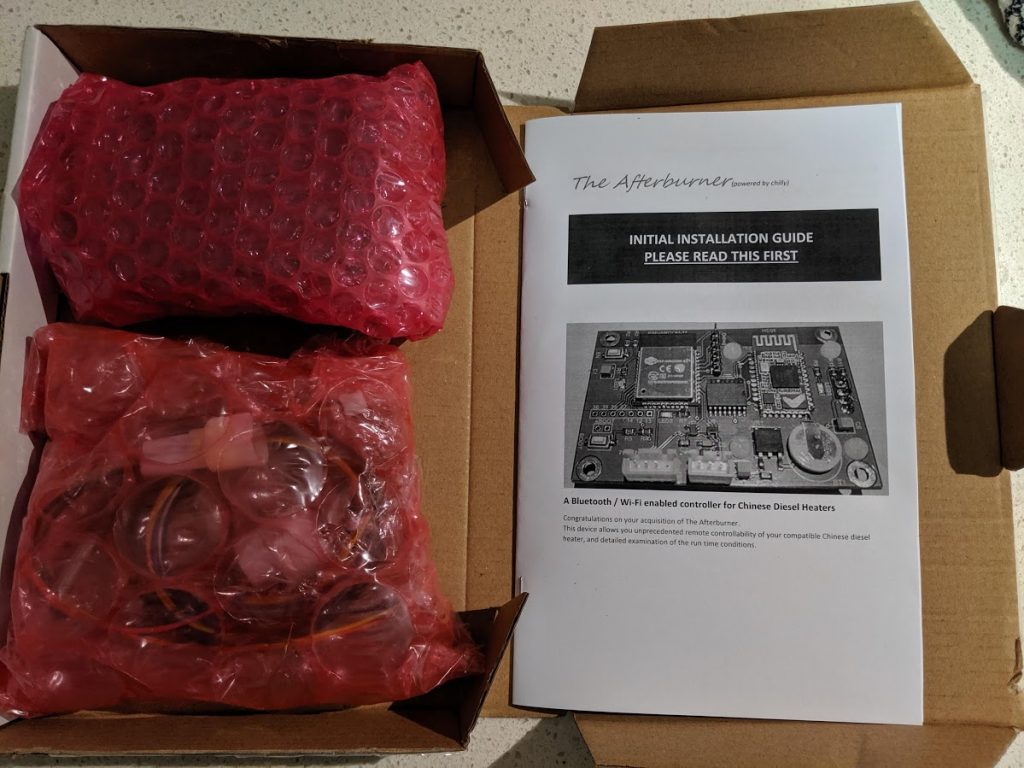
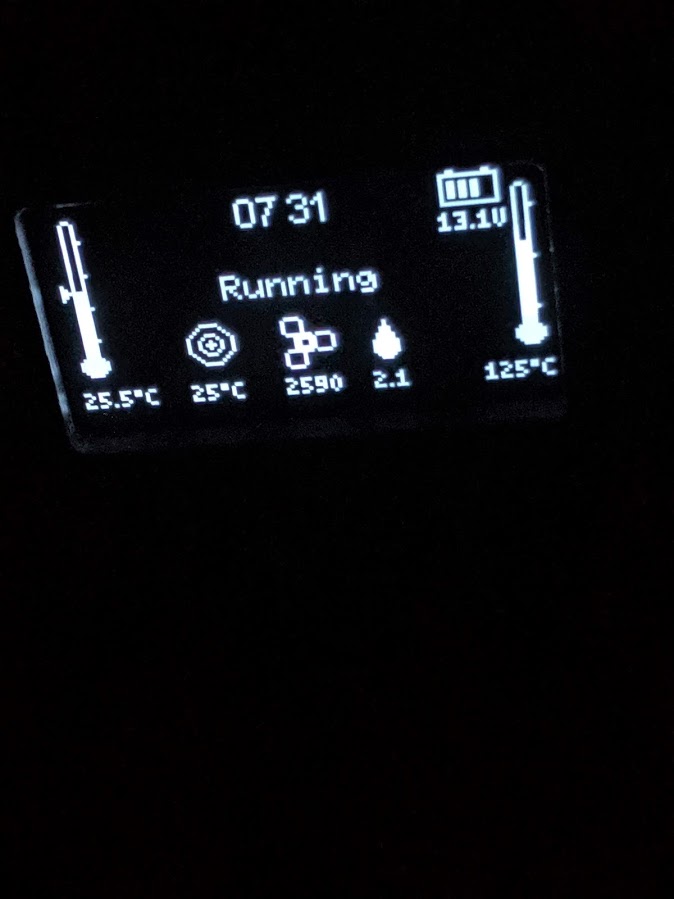
The controller is called ‘Afterburner‘ and is made by Ray Jones. Ray has been reverse-engineering the diesel heaters and has built his own controller with arduino. It’s got a fantastic interface and some great features. I highly recommend buying one. You can also build your own if you want as the code is on github.
The ‘Afterburner’ is a real quality piece of kit. It comes with an instruction manual as well as a cable to help you transfer your old settings across to the new controller. The display is easy to read and displays all the important information at a glance. The case is made of nice quality plastic and the whole thing feels very premium.
It has bluetooth and wifi control built-in, so you can control the heater from your phone, and some additional modes of operation. My favourite is the ability to adjust the ‘mid-band’ so that in themostat mode the heater will not ramp up and down trying to maintain heat. Instead it stays nice and steady.
It also has a remote temperature sensor. I put mine behind my fridge so it is away from the heater airflow. This seemed to help a lot with smooth temperature control.
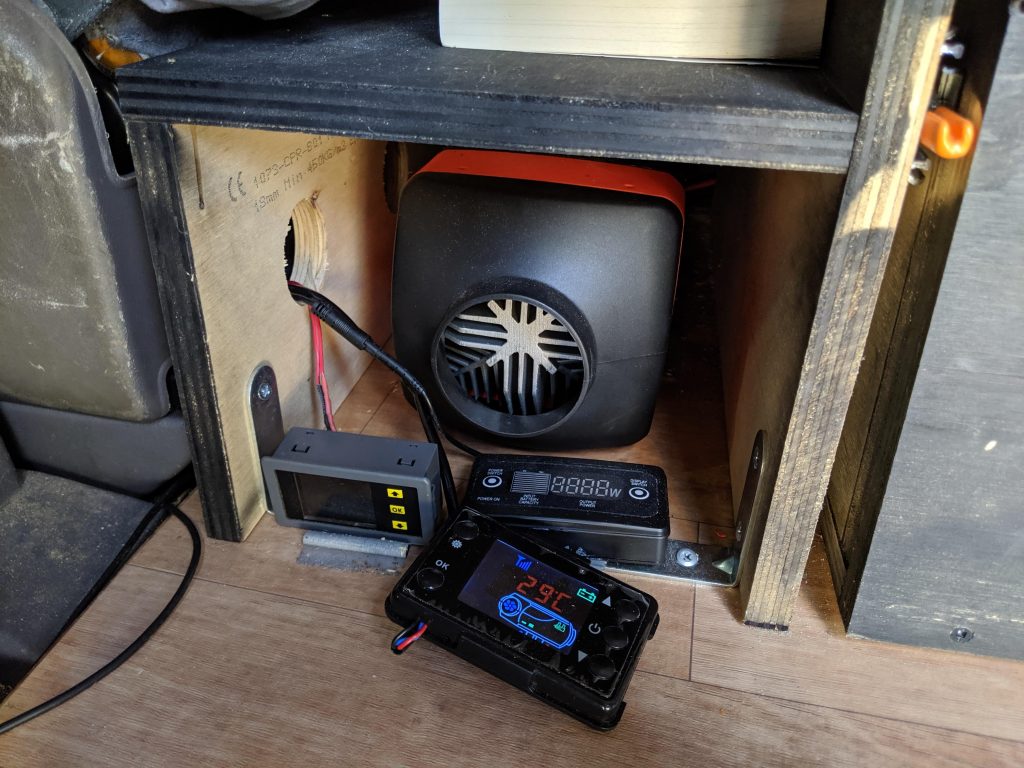
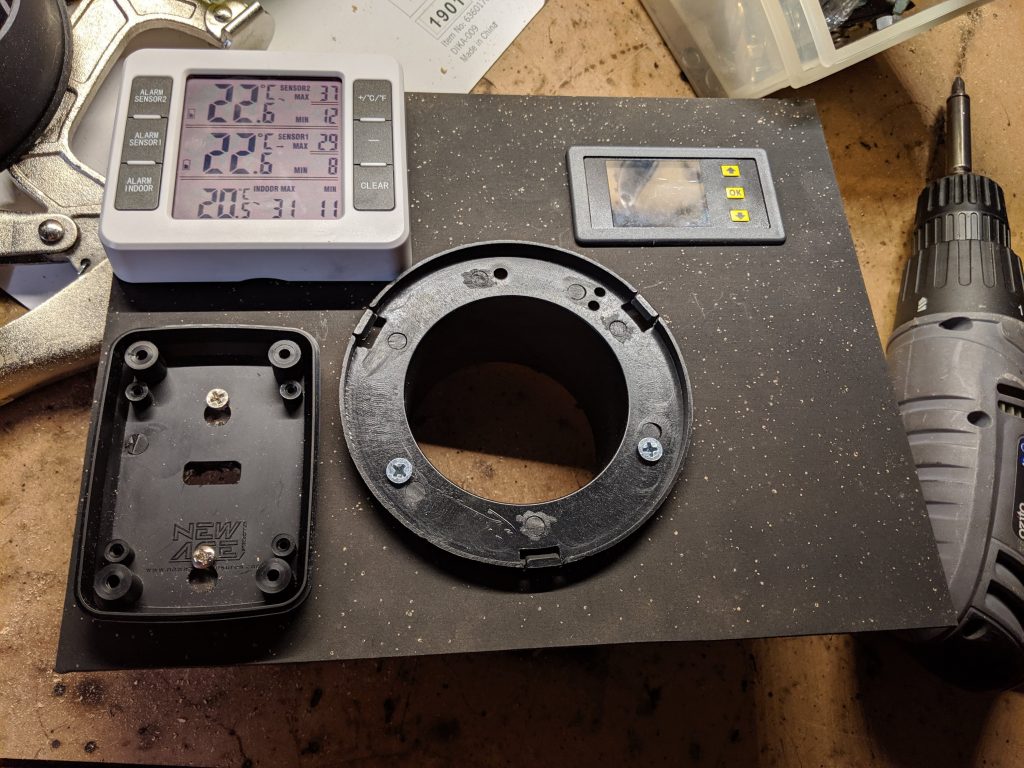
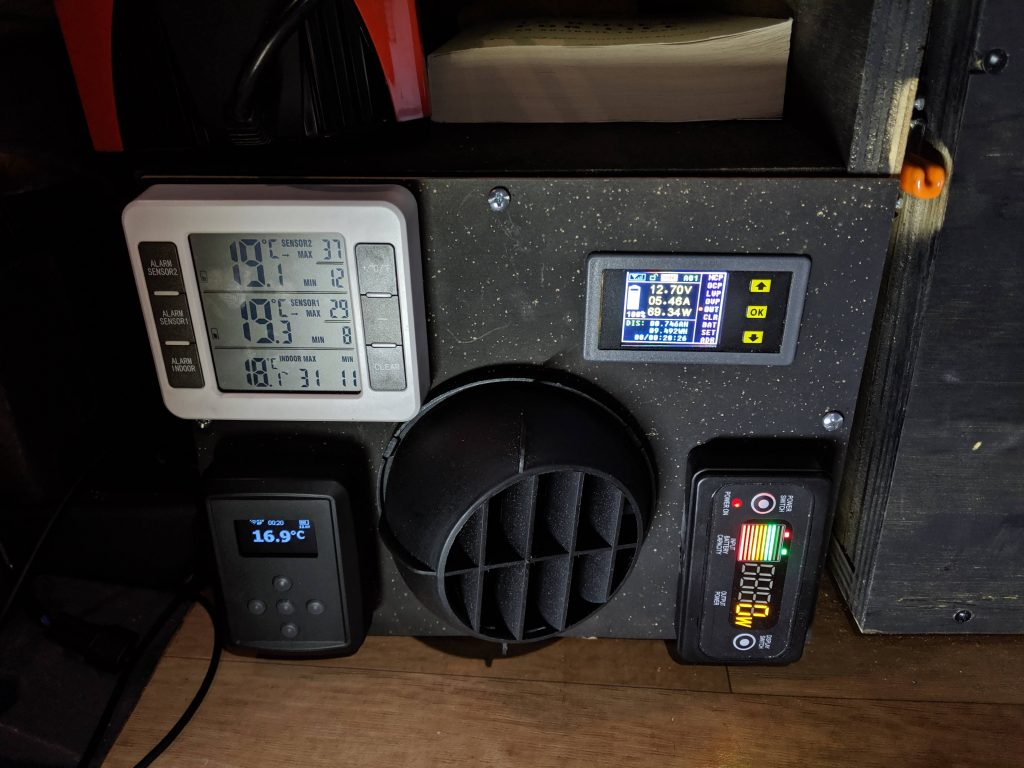
Lastly, I made a face plate with a swivelling vent, and used the space as a little ‘control center’ for the van.
- Top left is my fridge monitor, it wirelessly checks fridge and freezer temps, as well as the interior temperature.
- Top right is my power meter, it monitors power usage, solar input, battery voltage, and lets me turn on/off the whole circuit.
- Bottom left is the Afterburner controller for the diesel heater.
- Bottom right is the controller for my 240v inverter, I can switch the inverter on and off, and monitor power draw.
I’m really pleased with how the face plate came out, I think it makes the whole thing look very professional!
Did it work?
Yes! It was brilliant! There was a bit of tuning required (see below) but the heater easily kept the van toasty and warm.
I spent 10 nights in Jindabyne, it dropped as low as -9C outside, and it was one of the windiest weeks in a long time with 90-120kph gusts. Despite this, I was very comfortable inside in shorts and a t-shirt at a nice 22C.
The heater used very little power – around 5-8Ah overnight, and while I did notice my fuel tank seemed to empty faster than usual, that could also be because I was climbing the mountain every day to go snowboarding. I’ve read that the heaters use anywhere from 0.2L to 0.6L of fuel per hour.
It would take around 10-15 minutes for the heater to get the van warmed up, starting at around 5C and heating to 22C. Once it was up to temp, the heater would run at about 20% power to keep the temp steady.
This meant it was very easy to sleep with the heater running as it was very quiet, certainly quieter than my fridge, for example.
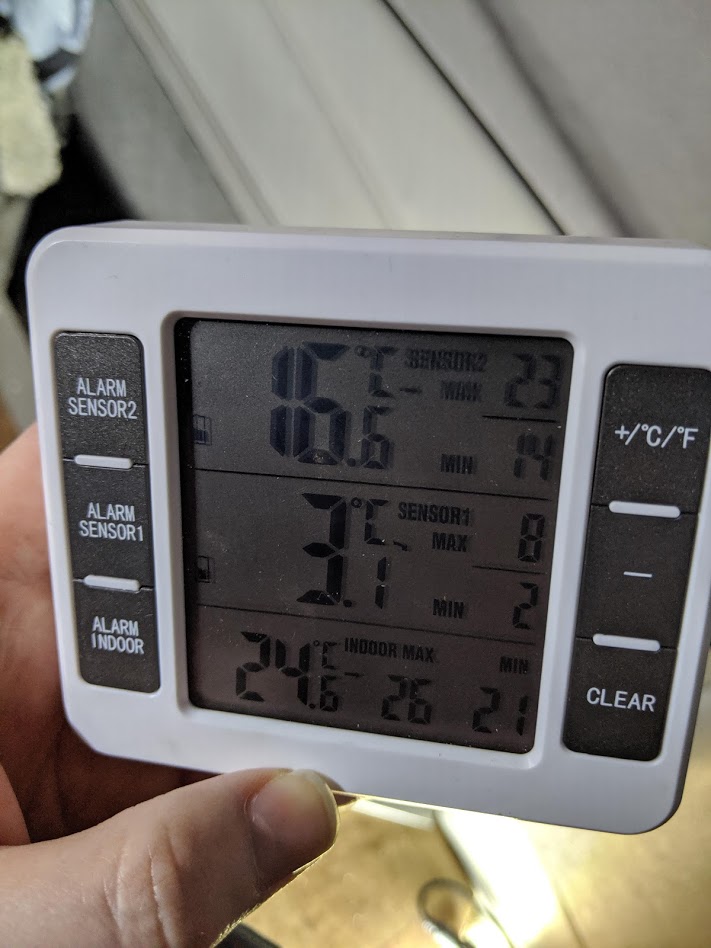
Early afternoon in Jindabyne. 24C at the front where the heater is, 16C at the bed at the back of the van, and 3C outside. 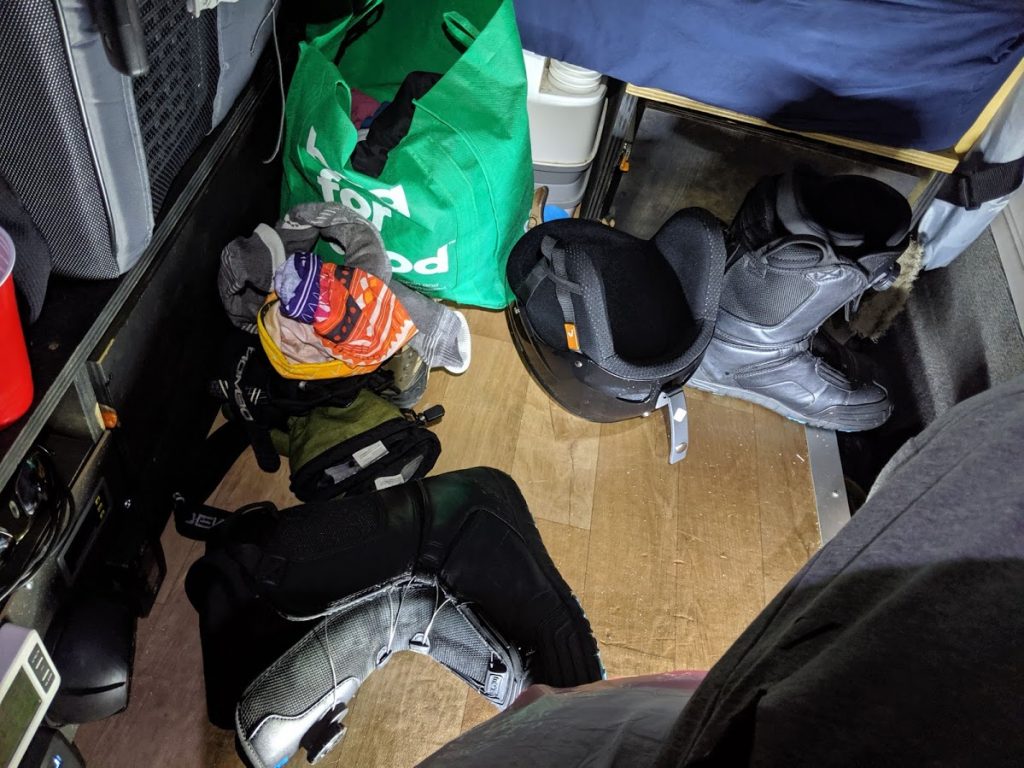
The heater was also great for drying out my snow gear like my boots!
In conclusion, I think a diesel heater is one of the most efficient and effective ways to keep yourself warm when travelling off-grid.
Tuning the diesel heater
If you’re thinking about installing your own heater, you may find this section useful. It sounds complicated but in reality, tuning the heater only takes an hour or two. I’ve included the explanations below so that you have an understanding of what you’re doing and how it works.
As I made my way south from Queensland towards Thredbo, and the temperature started to drop, I used the heater for the first few nights without incident. I kept a very close eye on the CO readings and woke up a few times during the night to check everything was working OK.
Once I arrived in Jindabyne and the overnight temperatures were much lower (around -8C), I started to notice a problem. My CO alarm was showing a slowly increasing PPM inside the van – after a few hours it was up around 30PPM and rising.
I suspect that the CO was pooling under the van, and then seeping through the holes in the floor (CO is slightly lighter than air).
While you will never eliminate CO completely, a properly tuned heater will produce a small amount that will likely drift or blow away with the wind, whereas if it’s badly tuned, it can be a real problem.
I started researching the diesel heater settings to better understand how it works. I spent a few hours adjusting and tuning the settings and eventually got the heater working nicely again. Once I had it tuned, it worked flawlessly the remaining 8 days of the trip, without any CO detected inside!
Variables
There are three variables to consider when it comes to tuning:
- Fan Speed (RPM)
- Fuel (HZ)
- Burn chamber temperature (C)
You can set the MIN and MAX values for Fan Speed (RPM) and Fuel (HZ), and this affects the burn chamber temperature.
These MIN and MAX values determine the operation of the heater in a linear 1:1 relationship between HZ and RPM. I’ll explain more below.
Operation Modes
The heater has two main operation modes: Temperature and HZ
- In temperature mode, you set a target temperature and the heater works to reach it and maintain it.
- In HZ mode, you set the amount of fuel to send to the heater and the output is however much heat that generates.
Both of these modes use the aforementioned MIN/MAX variables in their operation. Lets use some example settings to explain:
- MIN Fan Speed: 1000rpm // MAX Fan Speed: 5000rpm
- MIN Fuel HZ: 1.0 // MAX Fuel HZ: 5.0
Let’s say you set the heater to ‘temperature’ mode with a setting of 25C. The room temp is 10C. The heater will increase the Fuel HZ to 5.0 to try to reach the set temperature. Since there is a 1:1 relationship between Fuel HZ and Fan Speed RPM, the Fan Speed will also increase to 5000rpm.
Once the heater hits the target, the heater will decrease the Fuel HZ. Lets say it requires a 2.0 Fuel HZ to maintain the temperature. At that Fuel HZ setting, the corresponding Fan Speed RPM is 2000rpm.
HZ mode works the same as above, except you manually set the Fuel HZ instead of the thermostat controlling it.
Lets use another example setting to explain:
- MIN Fan Speed: 1000rpm // MAX Fan Speed: 3500rpm
- MIN Fuel HZ: 1.0 // MAX Fuel HZ: 4.0
At the above settings, at Fuel HZ 4.0 the fan speed will be 3500rpm
At Fuel HZ 2.0, the fan speed will be 1833rpm = (3500-1000)x(2/(4.0-1.0))
The heater is not smart
If the MIN and MAX values you set are not tuned correctly, the heater can run abnormally.
It can run ‘lean’ or ‘rich’, and/or the burn chamber can be too hot.
- Running ‘lean’ or cold can result in flame-out, and high CO output.
- Running ‘rich’ can result in soot build-up inside the burn chamber, which over time will prevent the heater from starting up. It can also result in high CO output.
- Too high burn chamber temperature can result in the heater shutting down or being damaged.
The key to tuning
The burn chamber temperature is the key metric to tuning the heater.
The burn chamber temperature should be no lower than 125C, to ensure a complete burn of the fuel being injected.
The burn chamber temperature can be as high as 180C when at MAX HZ.
The problem with the stock controller is that it doesn’t tell you what the burn chamber temperature is, or the fan speed! It gives you a simple graphic, but it’s not sufficient for tuning. This is why Afterburner is so worth the extra money.
Other things to consider
There is only one fan motor in the unit. This motor is responsible for blowing hot air in the cabin, as well as sucking in and exhausting the combustion air. This means that if you reduce the fan speed too much, there can be insufficient air pressure to the exhaust.
I noticed this problem on a very windy night, when the strong winds resulted in air blowing up the exhaust. I had to increase my minimum RPM to prevent this. I suggest that you don’t go below 1000rpm.
How to tune
It’s important not to use settings that you find online. This is because every heater install will be different – differences in manufacturing, the length and curvature of piping, the outdoor temperature etc. They all affect the settings.
It’s for this reason you may need to adjust the settings if your climate changes dramatically.
The process I used is as follows:
- Set the heater into HZ mode.
- Set the MIN HZ to 1.0 and MIN RPM to 1000rpm. Set the MAX HZ to 5.0 and MAX RPM to 5000rpm.
- Start up the heater with the setting at 2.0HZ. Give it 5 minutes for the temps to stabilize.
- Reduce the setting to 1.0HZ, wait 5 minutes for the temps to stabilize
- If your burn chamber temperature is too low (<125C) you can try reducing the fan speed, but I don’t suggest going below 1000rpm. If you can’t go any lower, increase your MIN HZ by 0.1 and wait 5 minutes each time until the temp is stable at 125C .
- Check that there is no smoke coming out of the exhaust, this can indicate a rich mixture. If there is smoke, increase the MIN RPM.
- Repeat steps 5 and 6 until you get a stable 125C burn temp, with no smoke out of the exhaust.
- That’s it!
Next, lets tune the MAX setting:
- Increase the HZ setting to 2.0 and wait 5 minutes for the temps to stabilize. Then, slowly increase the HZ setting (1.0 every 5 mins) until you get to around 180C burn chamber temp, OR you hit the MAX HZ of 5.0.
- If you reach 180C without hitting the MAX HZ, then slowly reduce your MAX HZ to whatever setting it was at when you got a stable 180C. As you reduce it, the fan speed will increase (due to the 1:1 factor) which will decrease the burn chamber temp. You may need to reduce the MAX RPM as well to keep the temperature steady at around 180C.
- If you hit the MAX HZ of 5.0 and still dont have 180C, reduce the MAX RPM slowly until you get 180C.
- In both cases above, check for smoke in the exhaust. If there’s smoke, increase RPM, or reduce HZ, as the mixture is rich.
Once done, reduce the setting to 1.0 again and re-check the temps and ensure they are stable. Then, step from 1.0 to 2.0 to 3.0 to 4.0 etc, each time waiting 5 minutes and seeing if the temp is stable, and you have no smoke in the exhaust. If you get smoke, increase the MAX RPM, or reduce the MAX HZ.
Once I had finished tuning my heater, it ran without fault for the rest of my trip and I never had any CO readings inside the cabin again.
I hope this post helps you, if you have questions feel free to comment below and I’ll do my best to answer!
Hi,
“The burn chamber temperature should be no lower than 125C, to ensure a complete burn of the fuel being injected.
The burn chamber temperature can be as high as 180C when at MAX HZ.”
Where did those value come from?
I don’t recall, but I researched it at the time of testing and writing.
HI,
great write up and useful info for me as someone who has just acquired one of these. I may yet get the afterburner, but a. he doesn’t deliver to the UK and b. it costs about the same as the entire heater set up!
One thing I wanted to point out to you is that the exhaust muffler has a small hole opposite the indent, designed to be a drain port. From the pic you showed it is not quite mounted correctly to perform this function.
Hey James. I cannot find the answer to a question I have. Why does everyone run a combustion air intake hose outside? Wouldn’t it be safe and simpler to just leave the intake port open to the inside air? Then you only have to cut one hole to the outside, and there is less risk of an intake hose sucking in exhaust fumes.
Thanks for the great article.
I only have the exhaust going out. My air recirculates like you said 🙂
Hi again, sorry for the repeat question… I only saw that it had already been answered after I sent my comment.
Thanks anyway.
Hi James, I’m installing a diesel heater in my Delica as well and was wondering about feeding is from the fuel tank. Did the shop that did the fuel connection for you tap directly into the tank or did the feed off the fuel line coming from the tank with a T-connection? Great and useful description!
Thanks.
Great writeup! Thank you. Maybe I missed it in the article, but what heater did you go with? I need to tune mine. I have a 2kw.
@thedoble.
Hello. Sorry, my english is bad, i speak german.
I mean you have an error in the calculation formula
Quote:
“At the above settings, at Fuel HZ 4.0 the fan speed will be 3500rpm
At Fuel HZ 2.0, the fan speed will be 1833rpm = (3500-1000)x(2/(4.0-1.0))”
I mean, you must use this:
(1000+(3500-1000)x((2-1)/(4.0-1.0))
–>
(MIN Fan Speed + (MAX Fan Speed – MIN Fan Speed) x ((“Test HZ Fuel”- MIN Fuel HZ) / (MAX Fuel HZ – MIN Fuel HZ))
“Test HZ Fuel” –> i not know english word. I mean the settig of Hz you want to get rpm.
You can test your caltulation if you not set “2” hz, rather you set it so minimum “1” hz.
you must get 1000 rpm but your calculation show other result.
greetings from nativ german.
Toshy
How did they install the fuel intake? Did you use the standpipe that comes with the unit, or just tee into a fuel line?
I’m pretty sure they installed a tee into the fuel line 🙂
Great article! Do you know if they installed a valve after the tee to prevent the heater from losing prime every time the van is started (therefore sucking fuel towards the engine)?
No, this wasnt needed. The heater stays primed for a few weeks at least. Then I just need to re-prime it which the pump can do itself.
Hi James
Great article and very helpful instructions on tuning a heater . . . I have recently acquired an AfterBurner and had also built a small device to capture and then to display on an OLED screen (and/or log onto an SD card) the various communications between the standard (blue) display controller and the heaters ECU (building on the excellent work and publications by Ray Jones) . . . among other things, this makes the heat exchanger case temperature and the actual fan speed available for both realtime use and also later review and/or analysis.
While following your excellent guide on tuning a heater, I found that the standard (blue) display controller wouldn’t allow a MIN RPM of below 1500 to be set. This meant that an undesirably high MIN Hz had to also be set to achieve the 125ºC desired temperature . . . obviously the Afterburner doesn’t suffer from this limitation and also makes the necessary temperature information directly available.
However, with both the standard (blue) display controller and the AfterBurner, I did also notice that for a given Hz setting requested, the RPM level set by the controller (i.e. the fuel/air map inferred/calculated using a straight line graph between the MIN/MAX Hz/RPM settings) is never actually delivered by the heater ECU. My observation is that the fan always runs at a higher RPM than that suggested/implied by the fuel/air map . . . and with a very wide fluctuation/range at tthe lower Hz/RPM setting, but a much narrower/range at the higher RPM settings.
This meant that in order to tune my 5KW heater I ended up with Hz/RPM settings in the AfterBurner controller of MIN 1.4Hz/500RPM and MAX 4.0Hz/2670RPM . . . but this generated actual fan RPM of 1312 average @ 1.4H` (min/max/ave @ 1.4Hz 1050/1670/1312) and 3040 average @ 4.0Hz (min/max/ave @ 4.0Hz 2950/3040/3005). With these numbers, I achieved a very stable 127ºC at the bottom and 181ºC at the top end (If you want to drop me an email, I am happy to share the data logged with you).
So my question(s) . . .1) is you experience similar to mine or not? 2) I presume your suggestion of not going below 1000RPM must relate to the ‘actual RPM’ not the MIN RPM setting?
Cheers
Dorian
Interesting Dorian! Thanks for sharing your info
1. I can’t say my experience was the same as yours. My ‘actual’ RPM would always closely follow the ‘min’ rpm, when running at low HZ values, hence my conclusion of the 1:1 ratio between HZ and RPM.
The settings I settled on were: MIN: 1.2hz/1050rpm MAX: 4.0hz/3350rpm. This got me a nice burn chamber temp of around 130C when running on MIN, and the fan speed would usually be within 50-100 rpm of the setting.
I recall hearing about a ‘poles’ setting, or similar, which the computer uses to determine the fan speed. I wonder if yours is not correctly set in the software so the ‘actual’ rpm figures are distorted? Other than this, I’m not sure why the figures don’t line up.
2. No, in my case it was the MIN RPM setting, as they both aligned.
Great write up.
1) Consider running the heater a few times over summer. I have had the problem where the first time running the heater for 8 months it puts out HUGE amounts of white smoke.
2) Where you have the vent blowing hot air, consider getting a 40cm flexible extension hose. I find it helps to direct the air around the van much better. You can also then aim the air at drying snow gear, boots etc..
3) haha, looking at your setup, it seems that you have the same problem as me, where the heater is close to the fridge, so the fridge uses more power to keep cool.
4) When you’re in Cooma or Jindy, fill up with alpine diesel. I had an issue where on an extremely cold day (-5C not including wind chill) where the fuel in the ~4mm clear hose running from the fuel line/tank to the small pump FROZE. Not fun. Alpine diesel solves this problem, just thought you should be aware.
5) The addition of a small 12v fan placed can also help to circulate the hot air inside the van, this will avoid having the front of the van hot and the rear of the van cold.
The best thing with these heaters is that you can hang up all your wet gear and your mates gear inside the van, crank up the heater, then piss of to the pub for a few hours, when you return everything will be dry!!
You’re also spot on with the 2kw vs 5kw. My 2kw is more than enough for my VW T5.
Great tips there! I have used my 12v fan to push the air around the cabin. I am thinking about 3d printing a ‘shroud’ to help direct the air a bit more. I like the piping idea too!
thanks Doble.
to be honest, the air temps were measured at the unit outlet, with the ducting removed. In the end I adjusted fan, and pump frequency and now everything is fine (tempwise). But of course I will have messed up the mixture. I was wondering about fan speed alone, more air = leaner mixture and higher temps, as would less fuel – but yes I understand your point about more air – lower temps.. Rays’ controller would give me scope to tune the unit.. unless I could measure the air/fuel ratio at the exhaust without spending much money..
I see, and yes without knowing the burn chamber temps it’s very difficult to tune. Cheers
If you are handy/capable with arduino, it is possible to obtain the burn chamber temperature information for under 10 dollars (using a WeMos D1 mini plus a WeMos OLED screen)
thanks James!
I now need to speak to Ray!
I fitted my 2kw heater last year (for occasional use) in my self built camper.. but first of all I ran the heater for many hours in the huge barn where the van is parked. I did not use a vent for this, just an open pipe. All went very well, and fitted to van.
The 2 vents in the install melted. I bought better quality and these melted.. I then measured the air temp and it was well over 100C
!
I had to revert to manual pump/fan settings to get the temps down. But i fear an incorrect mixture now..
I have not used heater since.
at best I need to tune, at worst the heater had damage from factory..
John
Hi John, it’s odd that the vents melted. The ones that came with my heater are made of a very heavy duty plastic, but I imagine if the air temp is high enough they could melt. You could try increasing your fan RPM as higher fan speed can reduce the outlet temp (more volume of air at a lower temp) – the other thing is, do you have any bends or long runs of outlet piping that could slow the air flow down?
Excellent write-up. I hope everyone, whether they have an Afterburner or not take the time to read this information. Isn’t it sad that all the Chinese can do is copy a Planar and then copy each other instead of progressing to the next logical step of an intelligent controller?
Great write up James.
There are so many factors in installing these well and you’ve done a great job listing the potential pitfalls.
Thanks also for the kind comments on the Afterburner. As you have found with information about rhe running condition there is knowledge and hence great power.