For the past two years I’ve been going camping with my friends. The very first trip was staying in a cabin at a campsite. After that, I tried buying my own tent and sleeping bag, but it didn’t work for me. The tent was too difficult to assemble, and I didn’t sleep well on the inflatable mattress and sleeping bag.
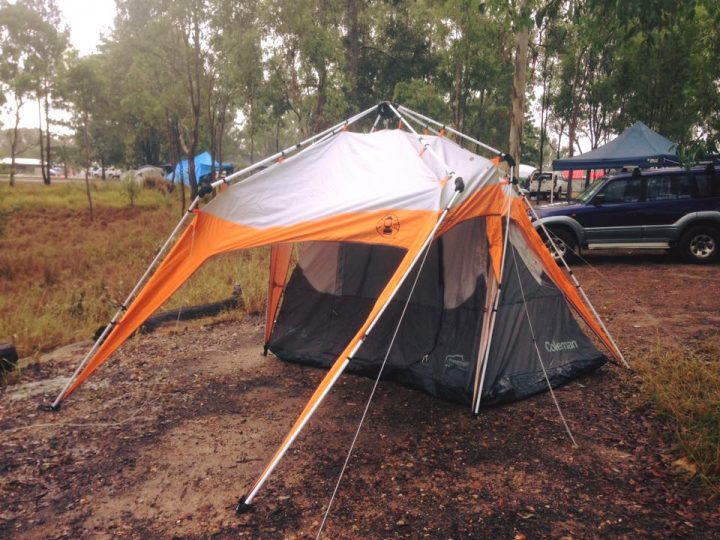
My sad tent …. after the rain I almost left it there to rot.
I really enjoyed camping, but the sleeping arrangement made it hell for me. I was determined to join my friends, so I decided to hire a campervan. Enter the ‘Taj Mahal’ –

The Taj was enormous, it had room to sleep four, and I copped a bit of flak from the guys for bringing it on our camping trip, however once the weather turned to torrential rain, guess who ended up inside the van!
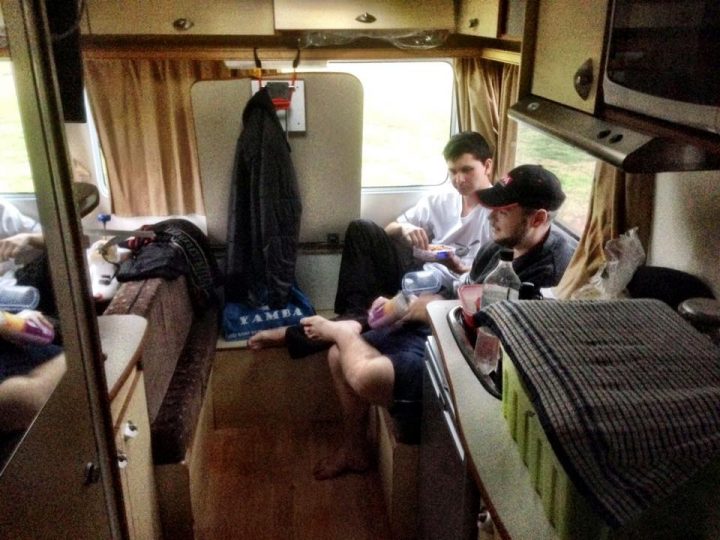
The taj was a great place to drink beer and chill out while the weather was poor
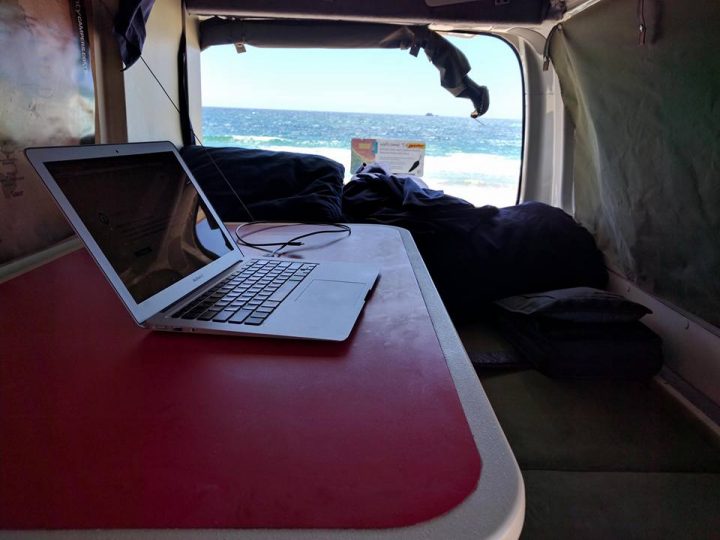
Next I decided to try a smaller van, I hired a Toyota Hi-Ace campervan with a high-top roof. The van was made by Mighty and was called the ‘Jackpot’ – it had a unique feature of a side-folding bed that allowed you to use the space during the day and then fold the bed down to sleep.
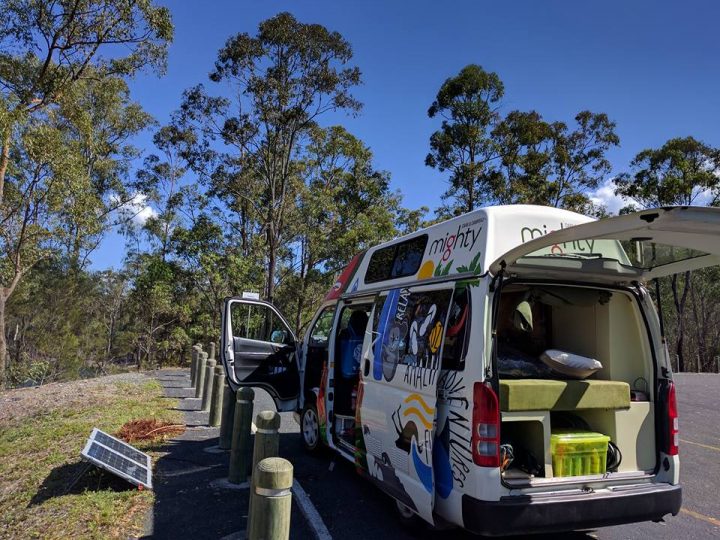
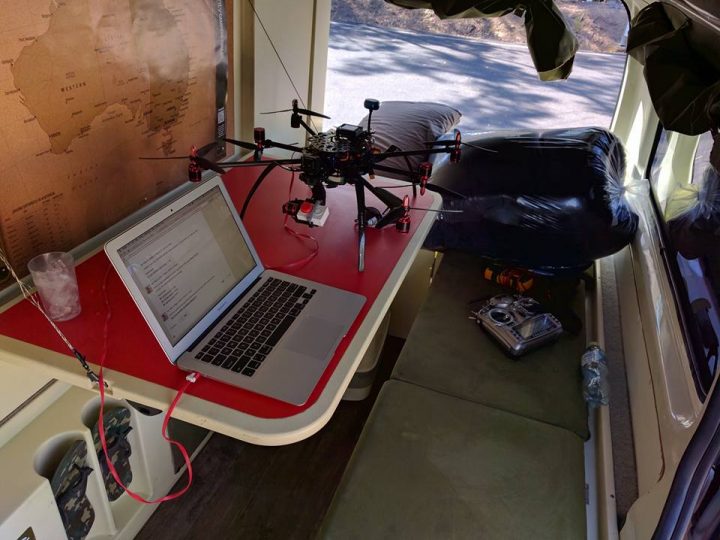
I took the van on a trip to Byron Bay and fell in love with it. I found places to mount my drones and took my solar panel along for charging. I visited a few spots along the way, but my fondest memory is sitting right on the beach at Byron Bay with my solar panel and my laptop and working with the most fantastic view.
After this trip I was convinced that a campervan would be the best way for me to disconnect from work on an ad-hoc basis. It would be easy to have a van packed and ready, and to just throw some food and drinks into the fridge and go on a trip for a few days anytime there was a free weekend or a quiet few days at work.
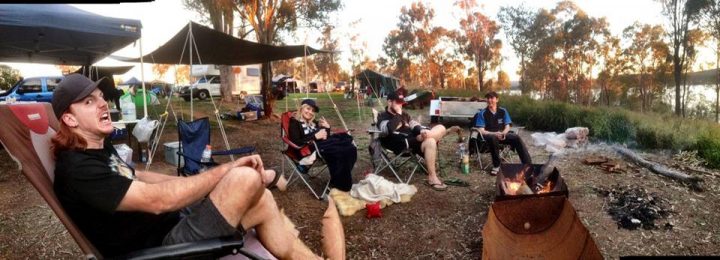
A ‘normal’ camp site…
Additionally, I would be able to take my copters, aeroplanes, camera and laptop so I could effectively work from anywhere. I’ve long wished to take my aeroplanes and drones to the most beautiful and extreme scenery around the world, however transporting a drone and it’s associated batteries, control equipment, repair tools, spare parts and accessories is extremely difficult via air, unless you buy a DJI off-the-shelf kit.
I started looking into which vehicle would suit me best. I looked at everything from cheap Toyota Vans to $200,000 Mercedes Sprinters. As with most things, I ignored the money and focused on what I wanted. Eventually I worked out that I wanted a proper four-wheel-drive system. I absolutely did not want to be spending my time in caravan parks on powered sites – I want to get out and do some proper exploring! I didn’t want to be limited by bitumen and electricity, hence I began researching 4wd vans.
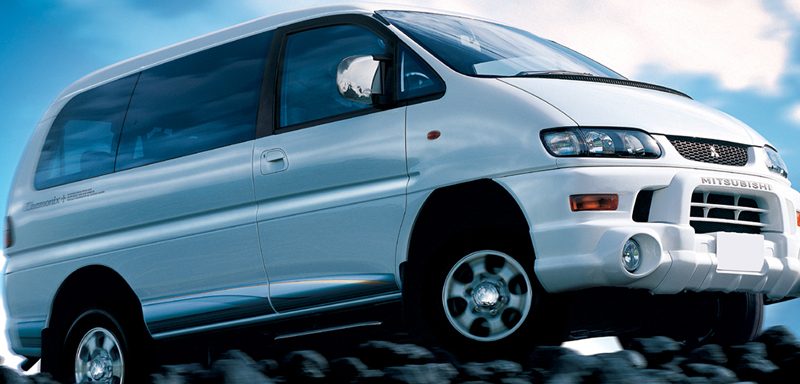
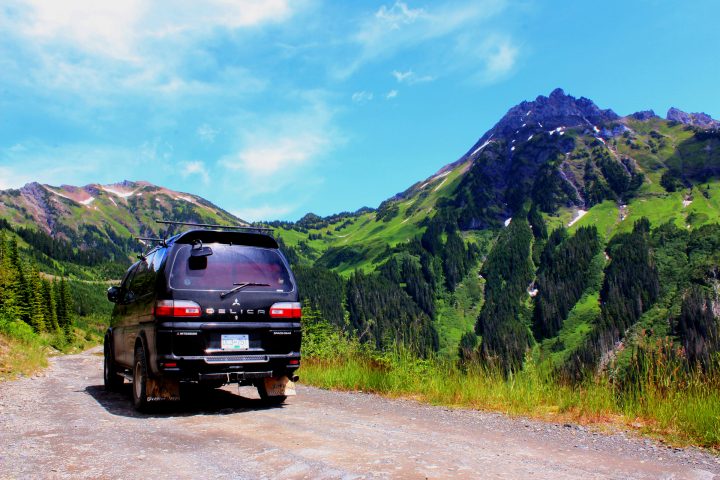
Enter, the Mitsubishi Delica.
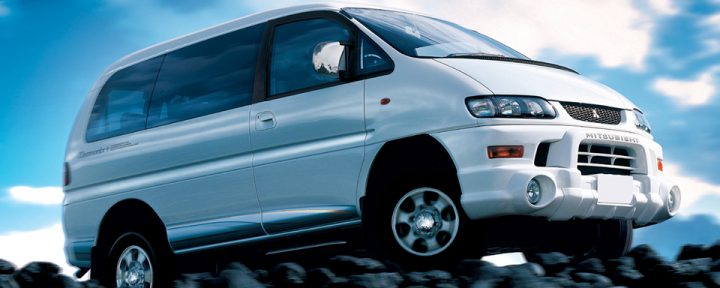
The Delica appealed to me because it had a proper 4wd system, it had just enough space in the rear for a proper bed, it had a really cool rear sunroof, you could move from front to rear without getting out of the van, and it was cheap to buy.
The Delica began production in 1994 but was not sold in Australia – it has only been imported. This means their numbers are limited, especially when you want for a specific variant of the vehicle.
There’s effectively four types of Delica – Diesel, Petrol, Long and Short wheelbase. I wanted a long wheelbase, and wasn’t fussed on Petrol or Diesel. I started by looking for a van which had already been converted. Each time I found one, there were all sorts of problems with it and I was beginning to understand that ultimately every vehicle would have it’s own set of problems, as I was looking at cars from 15-20 years old!
Eventually I found a Delica at Motorman Imports at Slacks Creek which looked alright. It had already been partially converted to a camper – it had a floor and bed in the back.
On a test drive with the van – my friend Cameron came along to help me out (and to shout “JUST BUY IT” at random intervals). He tested the 4wd system for me as well.
The van had a problem with the gearbox whereby the overdrive wouldn’t engage. Motorman Imports agreed to fix the problem as a condition of sale and did so, and I bought the van!
1994 Mitsubishi Delica PF8W – Series 1 Long Wheelbase, High Roof 2.8L TurboDiesel, 200k km
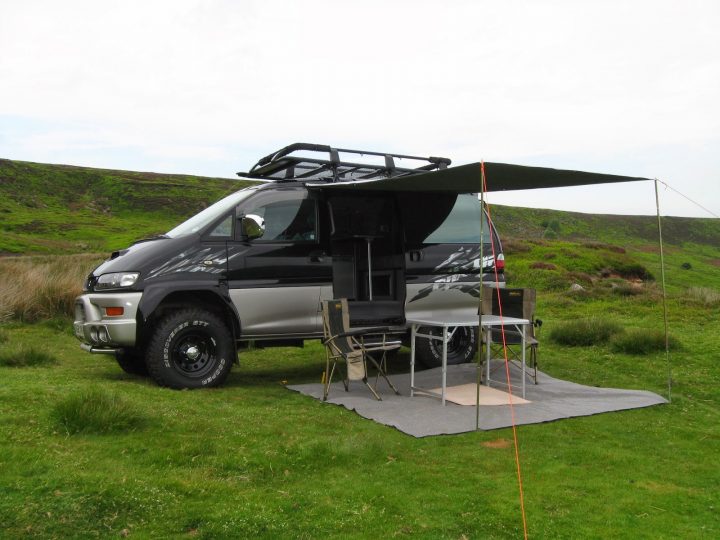
The van already had a bed in the back and an awning and roof racks – note the cool sunroof!
First off I drove the van to see my Dad – I didn’t know what sort of materials to use or how they could fit together practically. Dad used to build houses and is known for making things bulletproof! We unscrewed and removed everything to see what we had to work with.
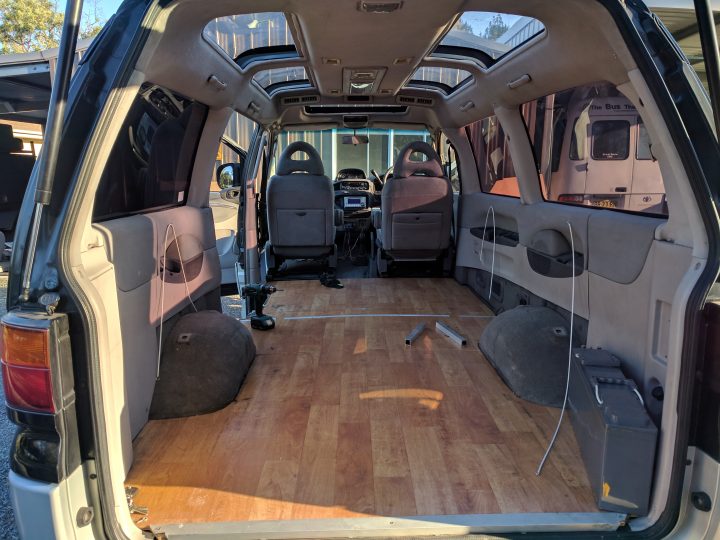
We decided to re-use the floor as it seemed to be in decent condition and would save a lot of messing about trying to cut the wood to the right shape.
As part of the purchase of the van, I asked the dealer to include a rotating rear seat from a wrecked Delica. These seats spin around 180 degrees and would be great for a passenger seat to allow you to sit inside the van if the weather was poor.
We replaced the passenger seat, however there was some welding and fabrication required to make everything line up. We found a local welder who was able to make a steel plate and weld it to the seat. This allowed us to re-use the existing chassis holes to secure the seat.
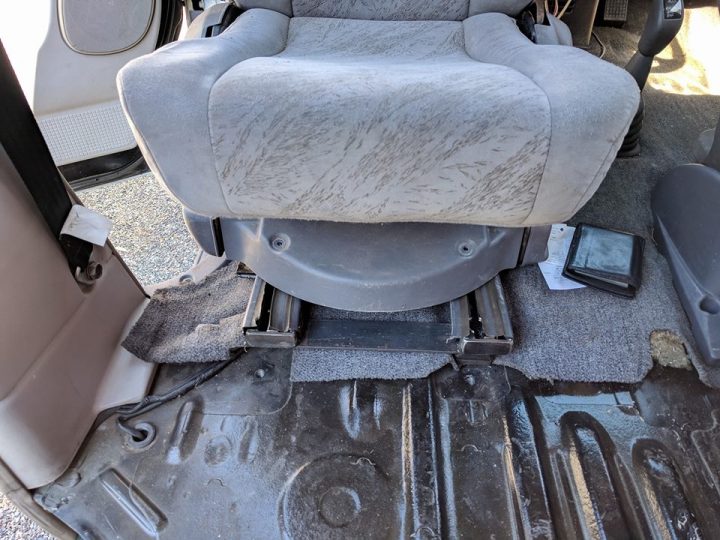
We also cut off the long sliding rails and welded some end-caps to keep things tidy.
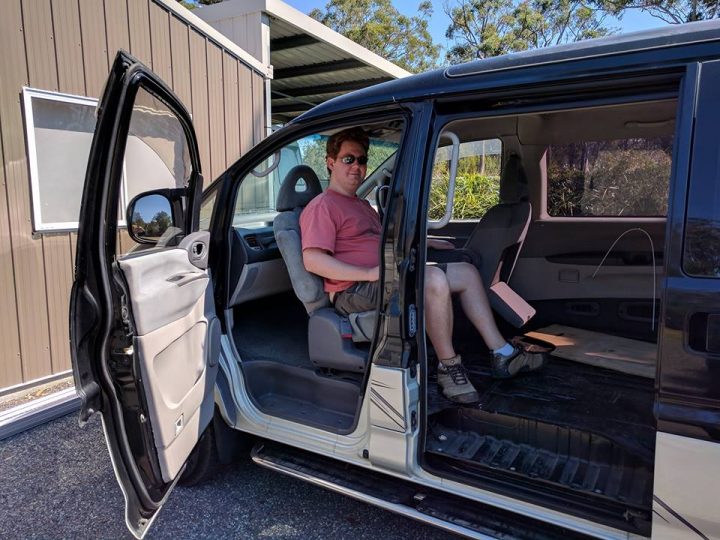
This gives heaps of legroom and really opens up the available space inside the van.
Next it was time to have the van serviced … I was a bit nervous about this, as I knew it was old and I was worried about what the mechanic might find! Mostly I was worried about rust, but it turned out that wasn’t an issue.
I took the van to the Delica Garage at Bundamba and spoke with Jonno who is the mechanic and proprietor. He set to work and immediately found a few items of note:
- The engine has been replaced. It’s still a 2.8L Turbo Diesel, but it’s not a Delica engine.
- The turbo was not having any effect. This was because the reference pressure tube had been disconnected – a simple fix to resolve, but it begs the question – why was it disconnected?
- The tyres fitted by the dealership were 18 years old, and were made up of a bunch of spares.
Jonno had a great can-do attitude and rather than bemoaning all of the above, he set about doing his best to make it right. At the end of the service, Jonno quoted me for around $2k of additional repairs needed over the next 12 months. This included a new harmonic balancer and a bunch of replacement suspension parts, all of which were worn or perished.
Lastly he recommended replacing the tyres due to their age – we agreed on some Yokohama Geolander All-Terrain tyres and Wes (Jonno’s assistant) put them on order. I planned to head back to the garage later in the week to have them fitted.
I was heading home when suddenly — BANG!

The front right tyre blew out at 100kph on the motorway. It was a scary situation – I could have careened off into the ditch, into oncoming traffic, or the van could have rolled. I eased it off onto the shoulder and winced as the rim made an awful grinding sound against the pavement.
This was a particularly dangerous place to stop as well – just past a crest in the motorway. The roadside assistance people came and moved me off the motorway, and then I paid for a towtruck back to the Delica Garage. Thankfully my new tyres had arrived later that afternoon, so I had them fitted straight away.
It concerns me that Motorman Imports would sell a vehicle with an assortment of old, spare, 18-year old tyres fitted. It makes me think of Paul Walker’s untimely death, due in part to the use of 9-year old tyres on the sports car in which he was a passenger.
With that drama out of the way, it was time to start designing my floorplan. I decided to use Fusion 360 for this, as I figured I would be able to lay everything out to ensure it would all fit based on my measurements from the van.
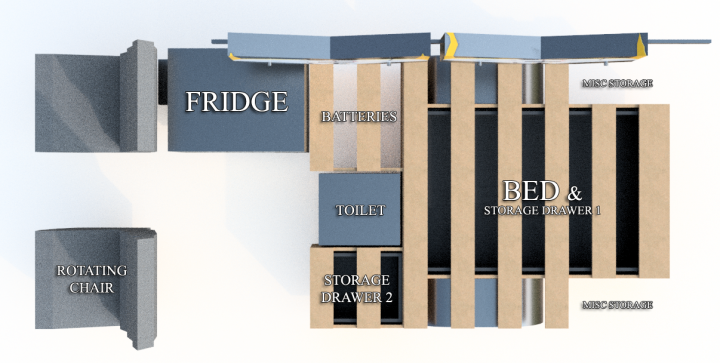
My requirements were challenging to fit inside the limited space –
- Dual zone fridge/freezer, able to be rolled to the sliding door to access from outside the van. This would save me from getting in and out of the van every time I wanted a drink or when cooking, which would be much easier on my back.
- Good sized inner spring bed – a comfortable bed is the whole point of this exercise!
- Being able to sit up in bed – I wanted to be able to sit on the edge of the bed, and I didn’t want to feel claustrophobic so this was important for me. It meant some compromises in drawer height but I hope it will be worth it.
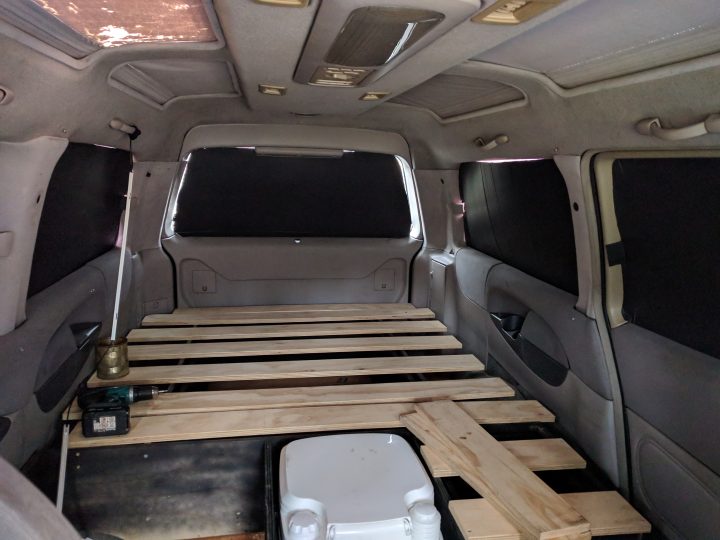
- Room for a porta-potti – having a toilet is essential if you’re going to be off-grid for a few days. This was very difficult to fit due to the height of the unit, but I got around it by removing the bed slats and having the mattress sit on the lid of the toilet itself.
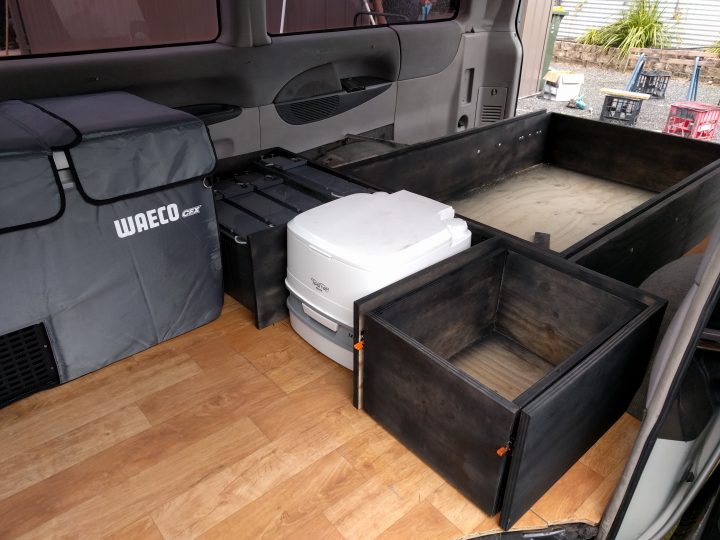
- Massive rear storage drawer – I could use this to store drone gear, camp chairs and all sorts of items. I figured the bigger I could make it, the more useful it will be.
- Pull-out kitchen – I had the wild idea of a pull out kitchen from the side sliding door, but this wasn’t possible so instead I had a small storage drawer instead to hold my cooking gear. This combined with the movable fridge should do the trick.
- Batteries – in order to run the fridge and also charge my RC planes and drones, I’d need a much larger amount of batteries than most campervans – I purchased 4x 125AH batteries for a total of 500AH at 12V.
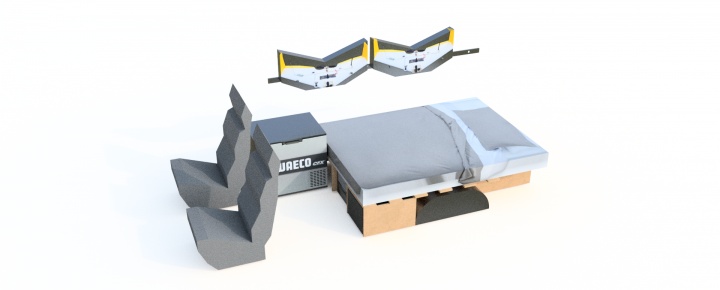
This shows how I plan to hang my planes against the window on a bit of ply with some hooks.


Front drawer will be used for cooking stuff, as it’ll be easily accessible from under the awning. This also shows the swiveling passenger seat.
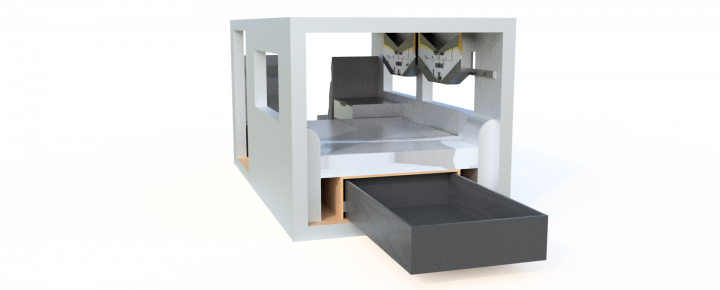
Rear drawer will be used to store bigger stuff like toolboxes, camp chairs, tables etc.
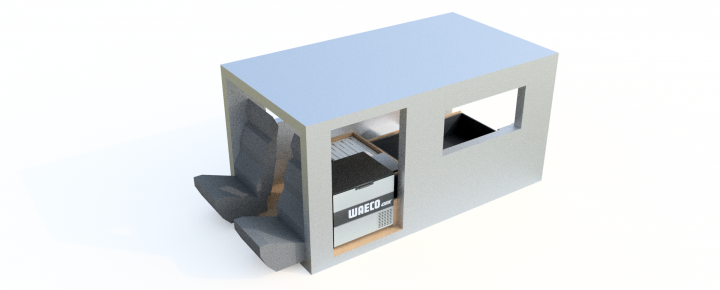
The fridge will be on sliders so it can be easily moved to the doorway for access while cooking. I didn’t want to have to climb in and out of the van every time I needed some butter from the fridge.
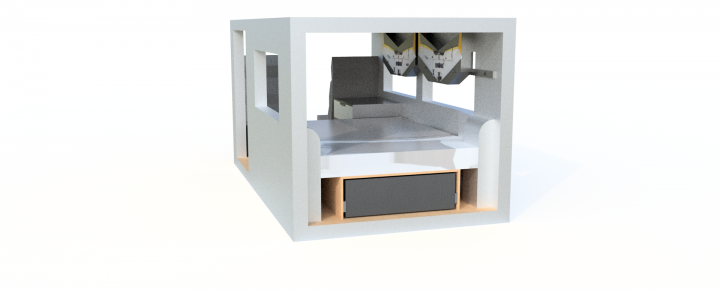
This design came about after probably 30 or 40 iterations, moving things around and seeing where I could squeeze space the most effectively. Finally I decided it was time to start the fitout!
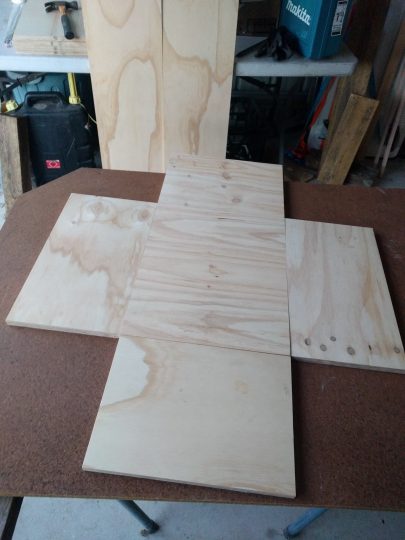
I took my dimensions from the 3d model and had the plywood cut to size by Mister Plywood. The wood itself is 18mm thick, non-structural plywood.
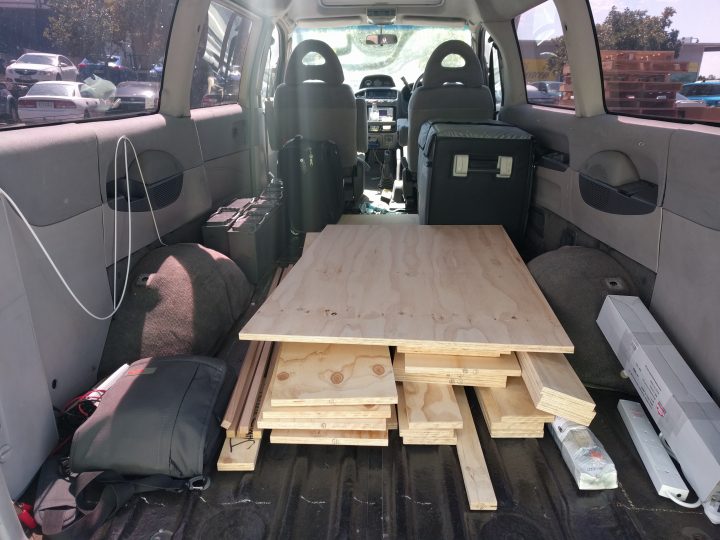
I asked the folks at Mister Plywood to write a number on the edge of each piece so I could track which sections were for which part of the build – this made assembly much easier. Around this point I started to really worry that I had the dimensions right!
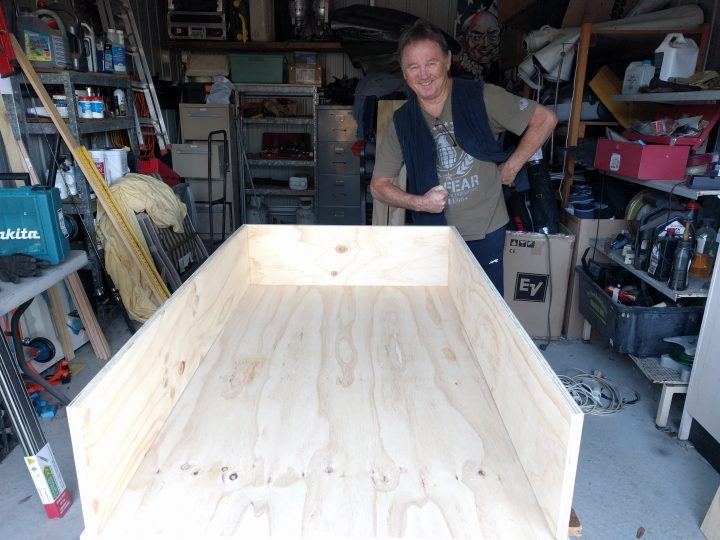
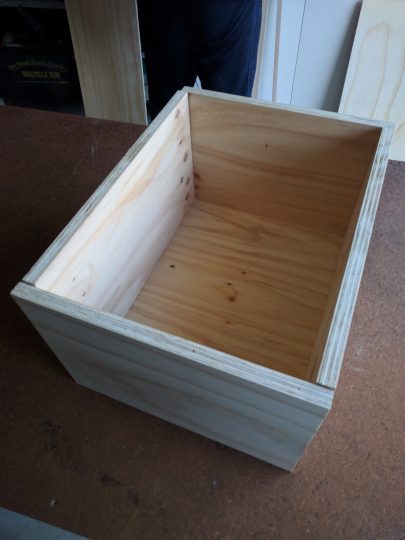
Off to see my Dad in NSW – he’s been building houses, laying bricks and selling stuff … forever. I figure if anyone can put some wood together it’s him, and sure enough he had this figured out real quick. We started with the large rear drawer and all the dimensions were spot on!
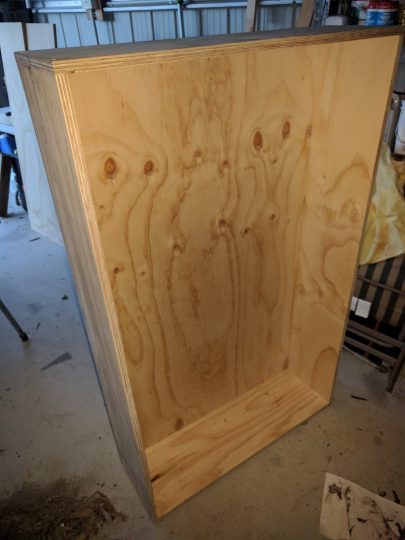
Assembled and waiting for the wood glue to dry.
Next we assembled the smaller front drawer. The advantage of pre-designing everything in 3d becomes apparent when you can just slot the parts together and add a few screws.
Once the drawers were done, we assembled the ‘front’ half of the design. This was challenging as my dimensions were off by about 5cm on the positioning of the rear wheel arches, so we had to carve a bit of wood out of the base of the assembly. It took a lot of trial and error to get it to fit with enough space for the fridge to slide to the door. We also had to raise one of the batteries up a bit so it would clear the curve of the wheel arch.
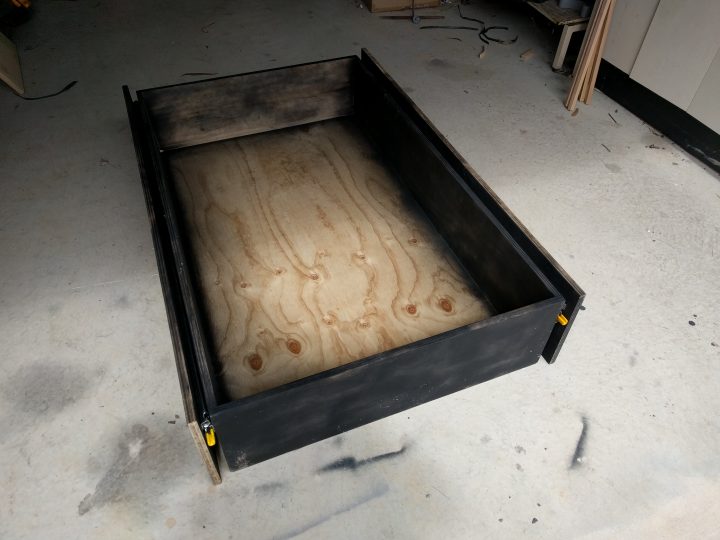
Next we had to fit the enormous sliders for the rear drawer. These were from Dunn & Watson and are rated at 227kg load. This took almost half a day to get right – we had lots of problems with the drawer slides striking the bolts used to attach them to the wood. After lots of tweaking and grinding we had it sorted and loaded the assembly into the rear of the van.
Next we fitted the wooden slats to the top of the frame. You may also notice that the drawer is offset to the right – this was to make a more usable space on the left under the slats. There’s enough space for a camp stove, or a water tank etc.

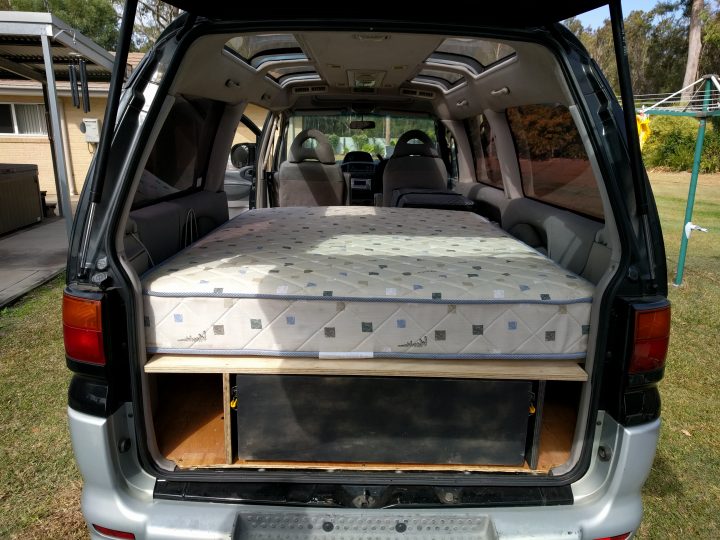
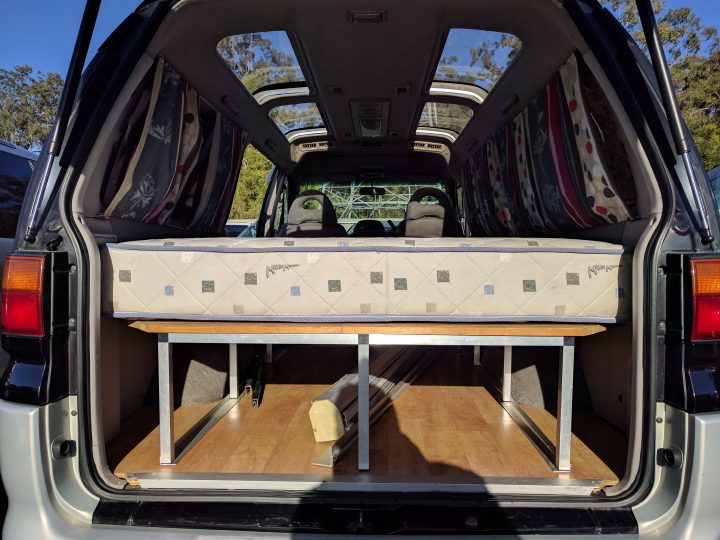
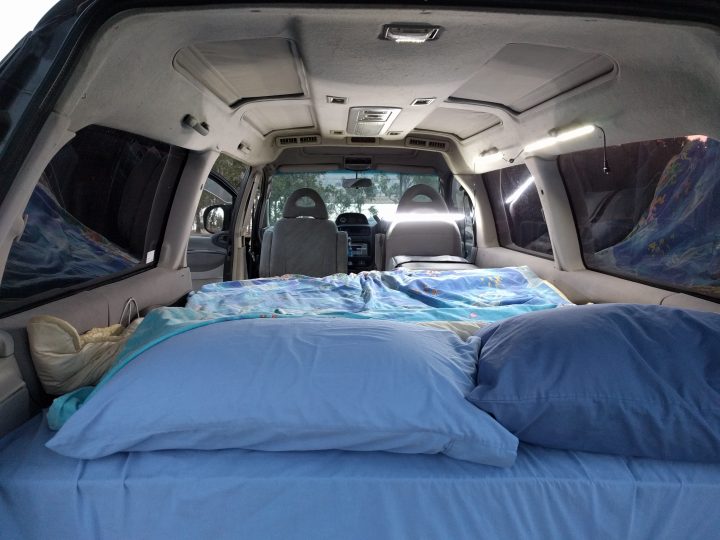
Here’s the double bed fitted. Due to the way the tailgate concaves in slightly at the rear, it cant be pushed up flush against the door. This means that the bed overhangs at the front and pushes against the fridge, so its impossible to move. I’ll need to fix this by having a bed made with the edges chamfered off.
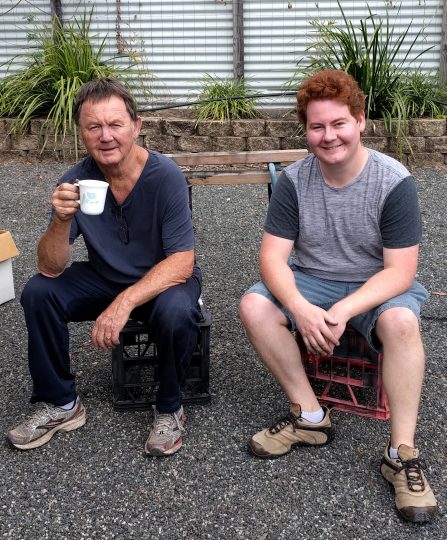
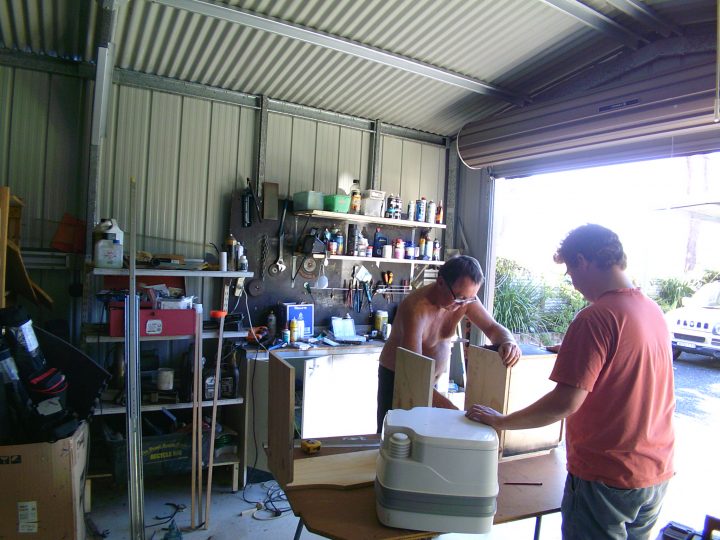
Dad and I having a break after fitting the rear drawer.
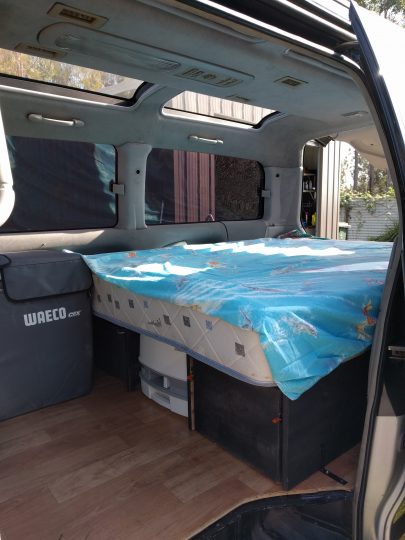
Everything in place, you can see how the bed overhangs the wood frame.
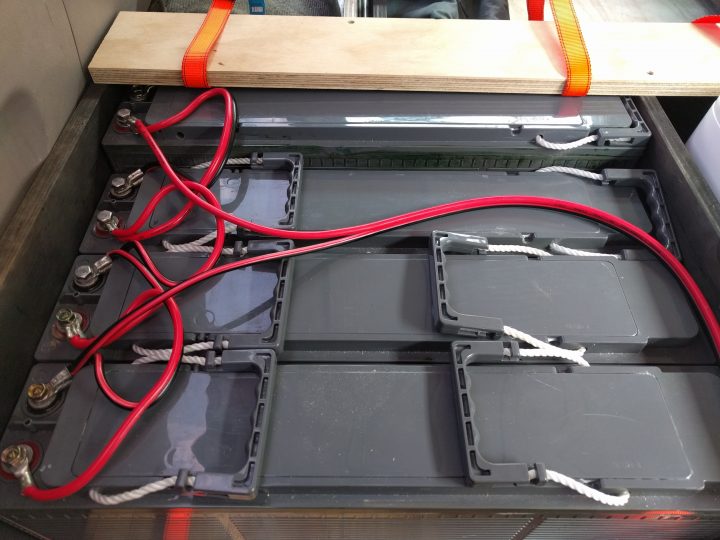
Batteries wired up in parallel.
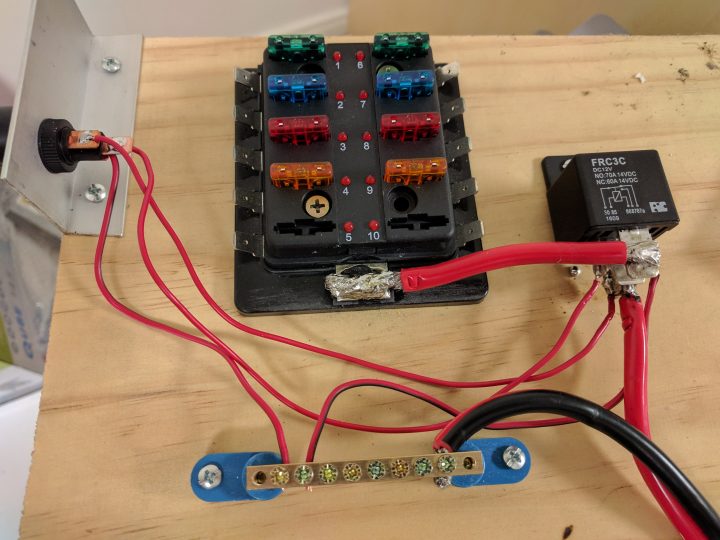
Master power switch and fusebox supplied by a 60A relay.
My power needs shouldn’t exceed 40A, but this is too much for a switch to handle, so a relay was required. I wanted a master switch to disconnect everything from the batteries – this way I don’t have to worry about draining them while the van is parked outside for a week or two. This will sit under the drivers seat along with my 300W inverter. I’ll 3D print a cover for it soon as well, as I don’t want the risk of the exposed contacts shorting.
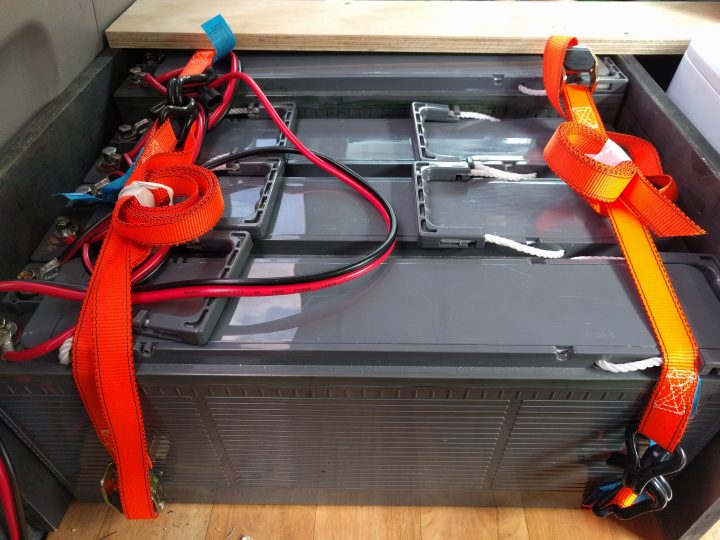
Batteries strapped down – this was only a temporary solution.
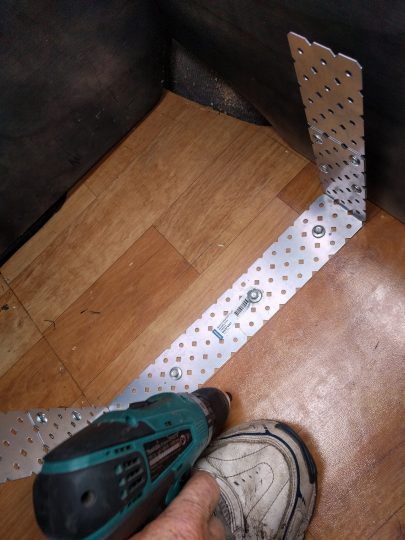
Screws into the metal floor of the van.
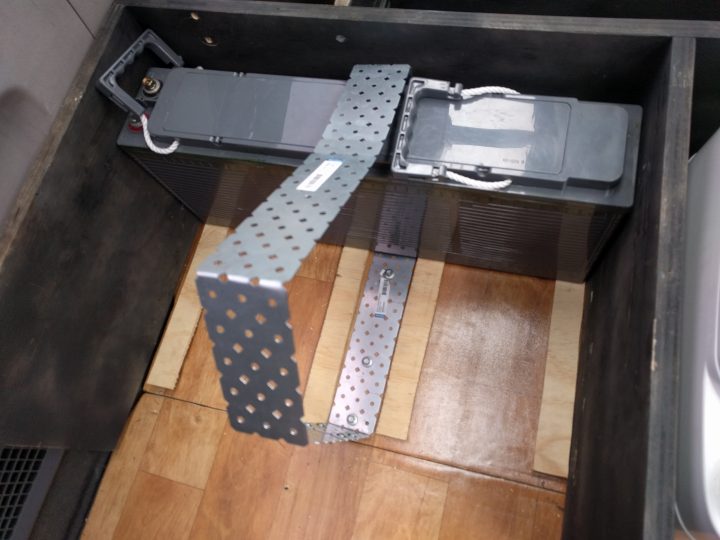
Mounting the batteries
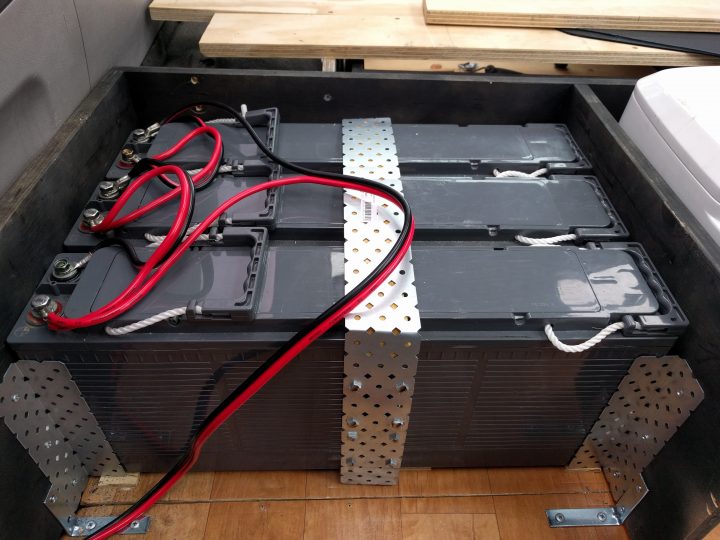
Locked down and packed with some foam, they’re very secure. I stepped down from 4 to 3 batteries as there just wasn’t enough space. This will also give me a bit of room to put the solar charge controller once I add one.
We made some ‘curtains’ out of some coreflute, they pop into the windows and stay there pretty nicely. We’ll see how long they last!
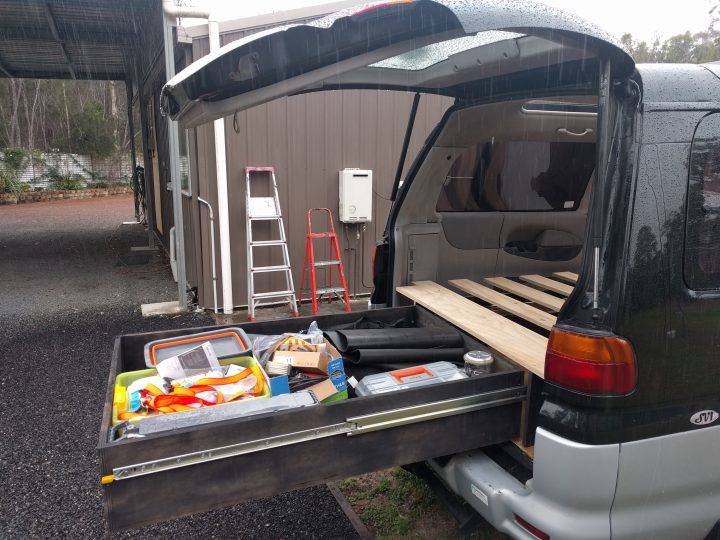
It was finally time to give the van a test run! My friend Cameron and I decided we’d do a last-minute camping trip up north on the weekend. I packed as best I could and we set off.
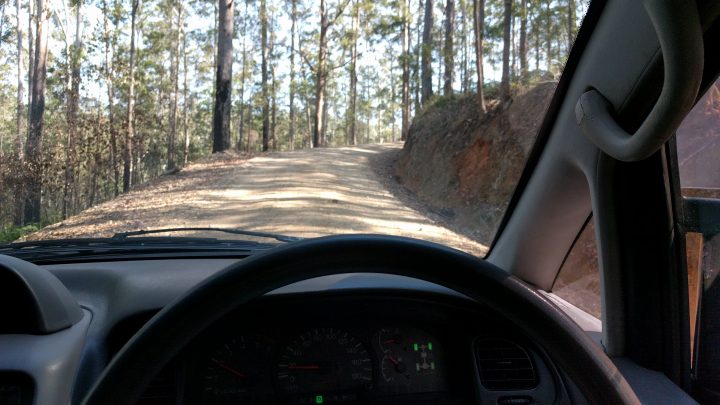
My first attempt at 4wd’ing – I quickly learned that I needed to use ‘L’ for going uphill and ‘2’ or ‘L’ for going downhill. The Delica had it’s own pace – slower than Cameron’s Mazda BT-50, but it never felt like I had to ‘gun it’ to get up a hill – it would just crawl up without a worry.

With the rear sunshades, front sunroof and front windows open, you really feel like you’re on safari!
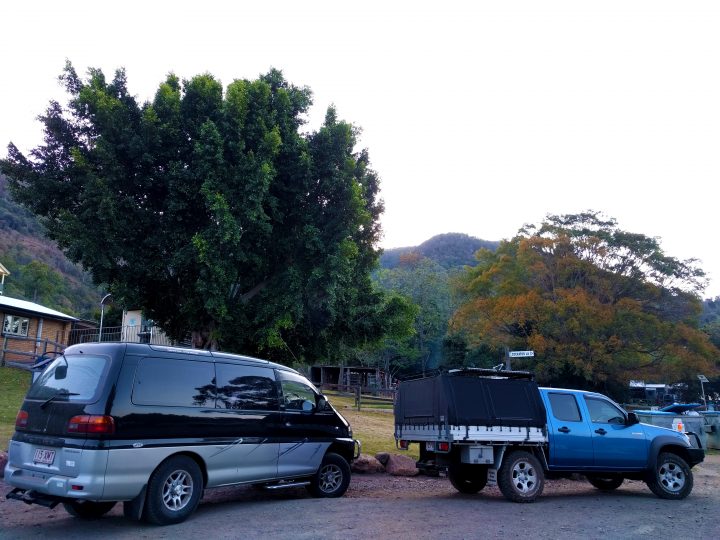
Looking for a spot to camp – this place was shut, so we carried on to Somerset Dam
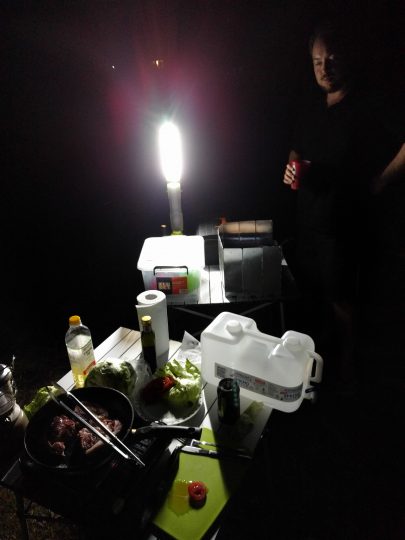
Cooking dinner at Somerset!
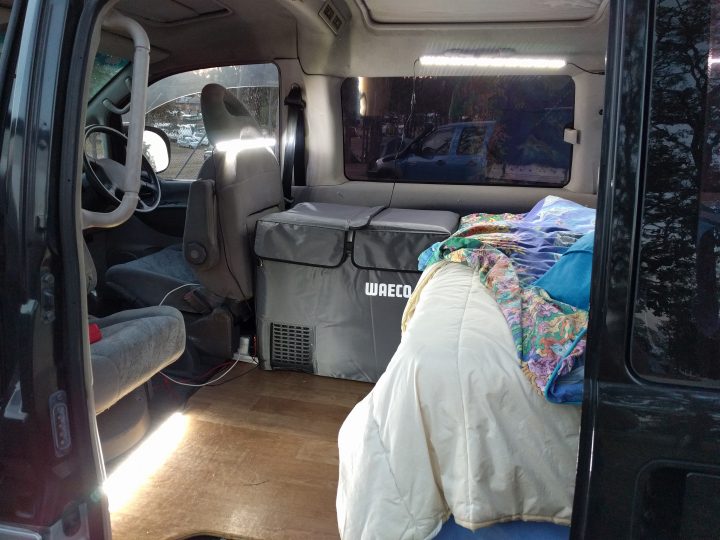
The inside of the van at twilight. Note the power board next to the fridge which is charging my phone and BT speaker. I have also connected some LED strip lights. The drivers seat is folded forwards to fit the fridge, but once the bed has been replaced with the custom-sized one, this shouldn’t be required.
The strip lights are dimmable and are mounted to aluminum extrusions, so they have a way of properly dissipating the heat they generate. I don’t trust eBay LED strips!
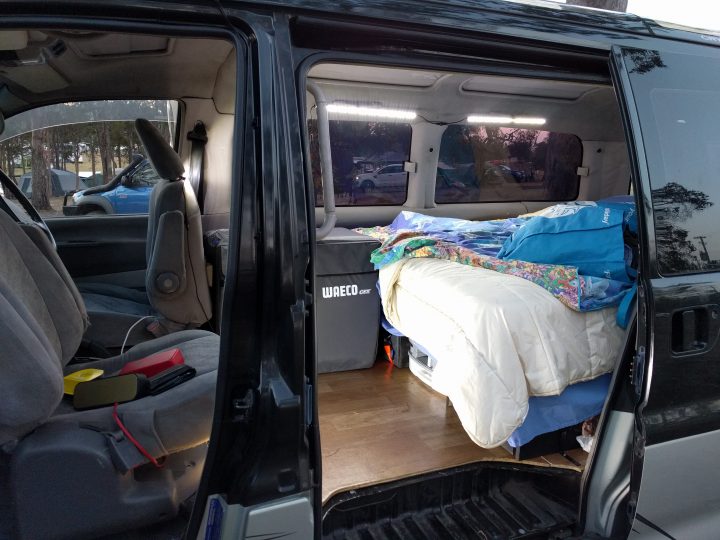
With the seat rotated, it’s a very livable space, and the front drawer is easily accessible.
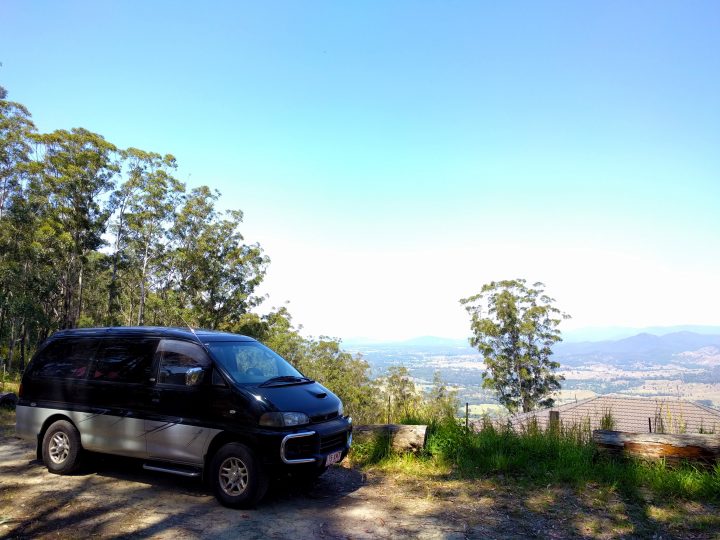
Overall I’m really pleased with the van, there’s still a few things to iron out but overall it’s exactly how I envisioned it would be.
My upcoming to-do list is as follows:
- Attach roof racks and awning
- Attach solar panel and solar charge controller
- Have a bed made to suit the rear frame.
- Mount my aeroplanes and copters!
Onwards!
We are busy with our conversionand are at the planning stage of the interior and are taking on every idea we can. A great post, thanks for sharing. Would love more information about the seat conversion. Thanks
Good luck on your build! Seat conversion is straightforward for someone with some welding and cutting skills.
Nicely done! I am also planning to move my middle Captains chair to the passenger seat and copy your design 🙂 I can see that the 2 front bolt holes line up well but the challenge is attaching to the 2 rear bolts. A few quick questions … 1) Since the rear bolt holes are UNDER the rails, did you then drill holes in the rail and bolt through the centre of the rail? 2) What thickness of steel did you use? 3) Since the rails are cut, how do you stop the seat from sliding off the rails – are they stopped by the end caps?
Great job, the interior looks cosy and sleek. Totally nailed it mate! Looking forward to future endeavours soon. Fantastic source of ideas.
Great conversion!
I just bought a 2005 short wheel base with lift kit, I sold my massive Renault master van as it was too big
I’m hoping to but a double bed across the back but I’m stripping my delica back and insulating the ceiling and walls etc
I’m in Victoria and I only want short trips away with my poodles 💫
So excited
Wanting to join a delica group now as I’m obsessed with my new van
Hi, loved the write up. I’m just wondering why a side slide out kitchen wouldn’t work? I’m trying to design my own camper and have seen some kitchens sliding from the side but not many. What problems did you encounter with that plan?
Mel
Hi Mel, thanks and glad you liked it!
Yes lots of people have slide-out kitchens but I think it would limit the floorspace you have inside the van, as well as that you’d have to have the door open to use your kitchen, which is not ideal if there’s lots of bugs about. I decided to build my kitchen into my rear swing-arm. I have a blog post coming on that in a week or two so check back soon 🙂 Also take a look at : my latest post to see how I built the interior
Exceptional pictures and explanations, FAR better then many professional presentations. Inspiring me to convert mine in a similar way. Thank you.
How kind of you Craig! Thanks and check back soon as I have some Delica updates to share 🙂
Hi Mate, Hey do have anymore detail about how you managed to make to the passenger seat swivel? I wan tot change mine as I will be setting up for camping as well. So, what I’d like to know is, can I use the same passenger seat (standard forward and back) as existing? What sort of modification do i need to do e.g you mention a welded plate, the underside side. Maybe you have some pics you wouldn’t mind sharing?
Great post, and hope to see you around the ridges.
Absolutely awsome mate…
Do you got a Facebook or Instagram page to folliw your future work?
We are currently transfering a LWB Delica S2 to a camper van ourselves in Adelaide. Goal is to travel around AU in about 1 year time. Where are you located? May be we can catch up with our Delis for a drink 😊! If you are interested in our conversation; http://www.myFaMa.com, FB: myfama, Insta: myfama_insta
Looking forward to see more of your Deli 😊
Cheers Marco
Thanks Marco, glad you liked it!
I do have a page for my drone stuff, my delica often shows up there 🙂 – https://www.facebook.com/JamesDobleAU/
There’s also a delica owners group on Facebook – https://www.facebook.com/groups/delicaclub/
I’m going to do some more posts on my Delica soon, so check back often!
Cheers James
Really great ,nicely written and crisp photos.Thanks.
Your dad looks exactly like my partners dad in Australia! And he too loves fixing and making things to last 🙂
I keep coming very close to buying a Delica, as my VW T4 camper may need serious surgery, your van is near perfect use of the space. I can live with a firm mattress so 3-4inc memory foam may do, would get a few inches back in headroom too! Plus it is pretty easy to cut.
Your mockups have given me some ideas this side of the world in the UK, great conversion.
Well done!
Thanks Richard! Glad you got something out of my write-up 🙂
James, great write-up! I’ve always loved camping and the creative ideas people come up with to make the camping experience even better. Keep up the good work.
Ralph
Thanks mate!
Great conversion! I’ve just bought a LWB one, and am looking for replacement tyres. The ones on mine (from Japan are 225/80R15) Can you tell me what size your replacements are?
Thanks! My new tyres are Yokohama Geolander GEO15 All Terrain 235/75R15